How to Schedule Client Meetings with Squarespace
Heads up: I use affiliate links for my fave products. If you click and purchase, I may receive a small commission at no extra cost to you.
In this post, I’m going to show you how to schedule client meetings with Squarespace - easily and for free!
So, the way we’re going to do this is through an awesome collab between Squarespace and Acuity Scheduling! This makes scheduling client meetings super easy, eliminating the need for emails back and forward trying to find the right time and takes care of timezone differences for you.
Watch the video or follow the instructions below!
When you’re logged into Squarespace, you’re going to click "Pages" then create a new page by clicking the + sign and selecting "Page."
Title this page, start with a blank layout and click "Start Editing."
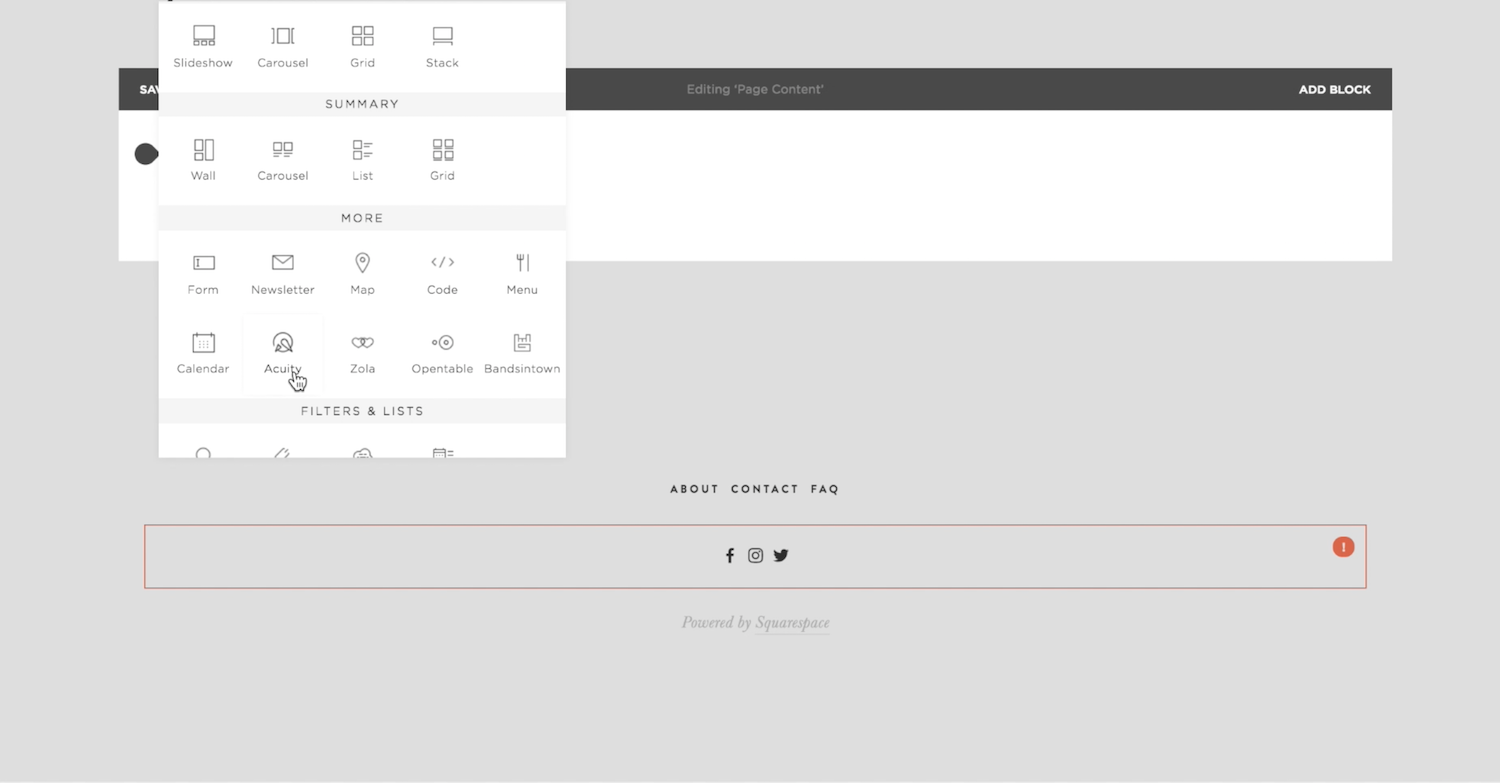
Next, click on the grey teardrop shape and insert the "Acuity" block.
Now lucky for you, since you have signed up for Squarespace, you can actually get the Emerging Entrepreneur plan, which is usually $10/month absolutely FREE!
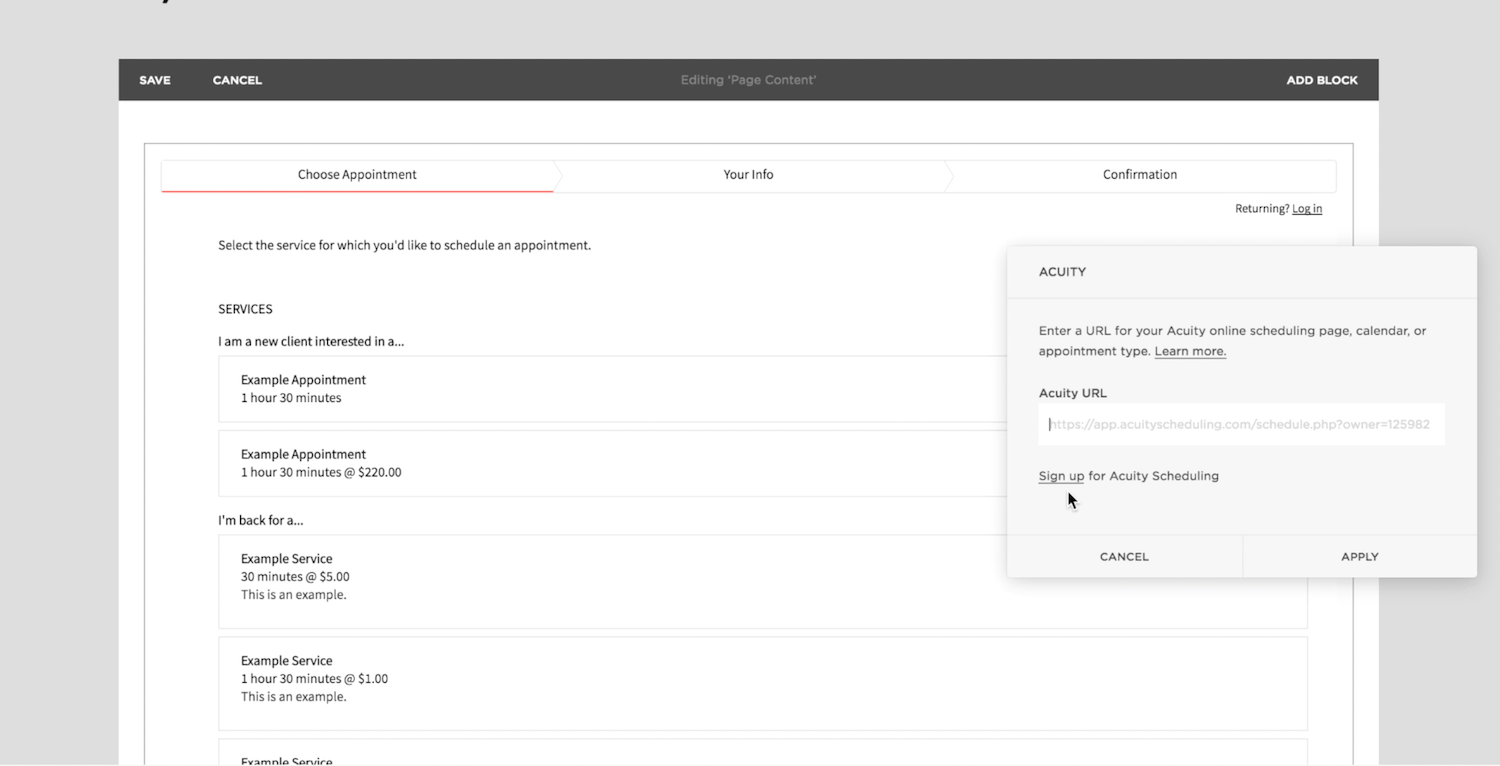
Click "Sign up" and create your account.
First, click "Set up your Calendar Availability" and set your regular weekly hours (when you're available to take calls).
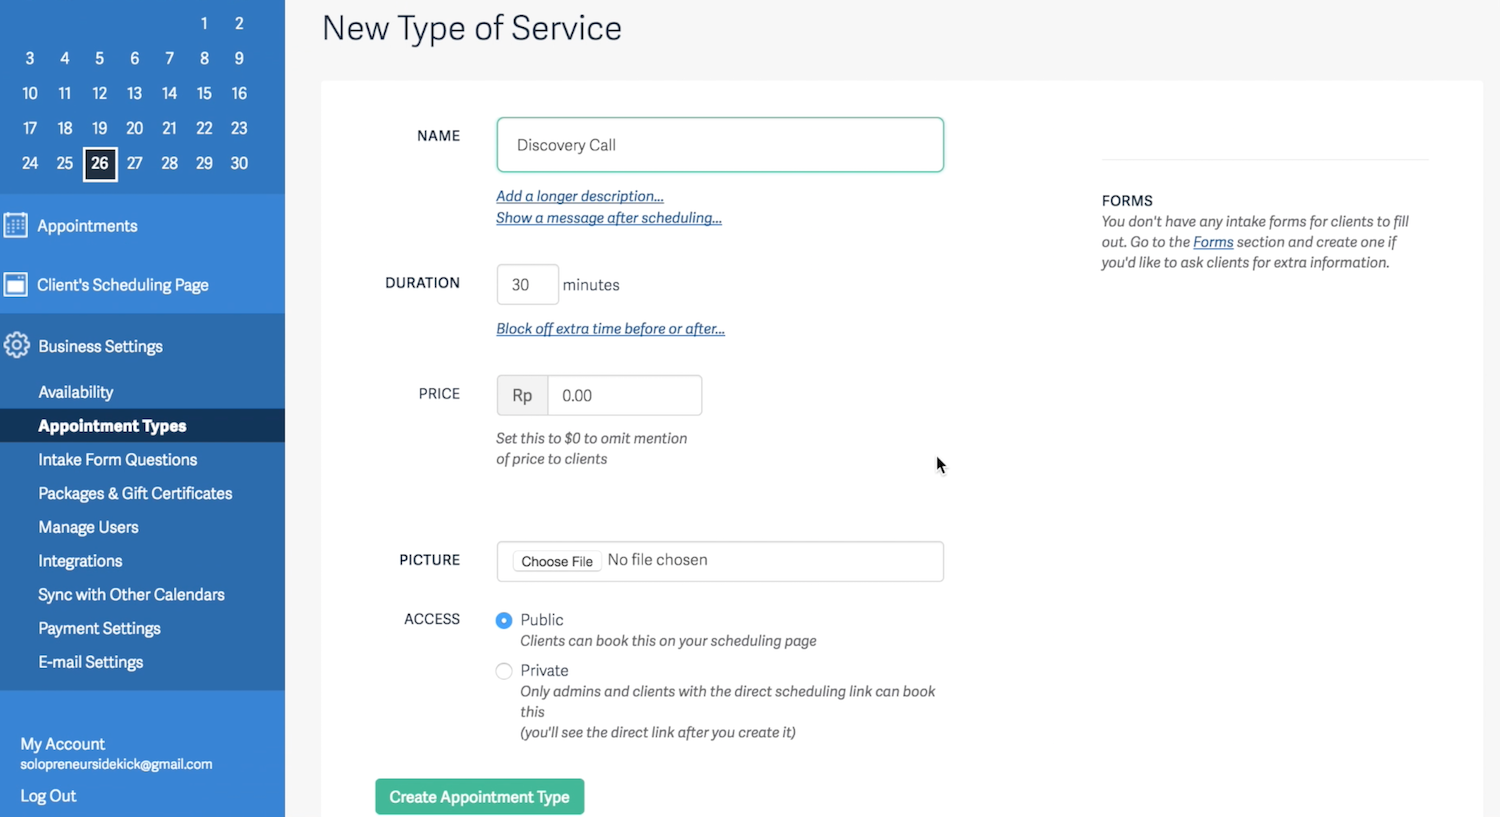
Next, click "Create your Appointment Types" > "New Type of Service" and type in whatever you want to call it, whether it’s a Discovery Call, Consult Call, Virtual Coffee Date... whatever you want!
Fill in the duration and price (in most cases, it will be a free discovery call).
Next, click "Customize your Client's Scheduling Page" and then "Customize Appearance"
Here you can decide if you would like the monthly or daily template and provide scheduling instructions.
IMPORTANT: Make sure to check the box that says "Require clients to choose their time zone when booking." We're working online and booking clients from all over the world so this is essential!
Next, click "Scheduling Page Link" and copy your scheduling link.
Now, we're going to go back into Squarespace and paste that link into the Acuity Block. This will automatically embed the scheduler you have just created!
This is what your scheduling page will look like for clients:
Clients will select their time zone, select a date and time and automatically be booked in. They will also receive a confirmation email + reminder emails before the call too. Amazing, right?
The last thing that you want to make sure you do is change the URL slug on your Discovery Call page in Squarespace to something you will remember (so you can give this page out all the time!)
Click on the gear icon next to your page title, scroll down on the pop-up and edit the "URL Slug." For example, /bookme (you need the / for this to work).
Lastly, make sure you go through all of the other settings in Acuity and customize them for your biz before you go live with this!
You can sign-up for a free trial of Squarespace here. Use the code SIDEKICK10 for 10% off your first year!
I hope you’ve found this tutorial super helpful. Let me know in the comments if you have any questions and I'll see you soon with more tips!


These tech tools will be helpful for you no matter what dream project you're working on right now! 💖