How to Host Live Trainings or Webinars with Ease!
Heads up: I use affiliate links for my fave products. If you click and purchase, I may receive a small commission at no extra cost to you.
I've been looking for a software like this! 👀 Here is an easy way to host live trainings for your community!
HIT PLAY OR READ THE POST BELOW:
WRITTEN INSTRUCTIONS:
I've been looking for a software like this for ages; one that would allow us to host a free live training or webinar in a really nice and simple way.
Well, I finally found it and in this post I'm going to show you exactly how you can use it too!
The platform is called Streamyard, and not only are you going to be able to host your live training, but you can also stream it to different social media profiles as well which is super convenient.
The reason I love this one so much is because of how easy it makes it for your clients to join the training. Other platforms will make your clients log in, or have to remember their password, or email them a magic link. With this one you don't have to do any of that! You just share a simple link with them, and then they are going to enter in their name and be able to watch the training and access the chat. So this is going to work perfectly with any other email marketing tool that you're using.
Here is the pricing:
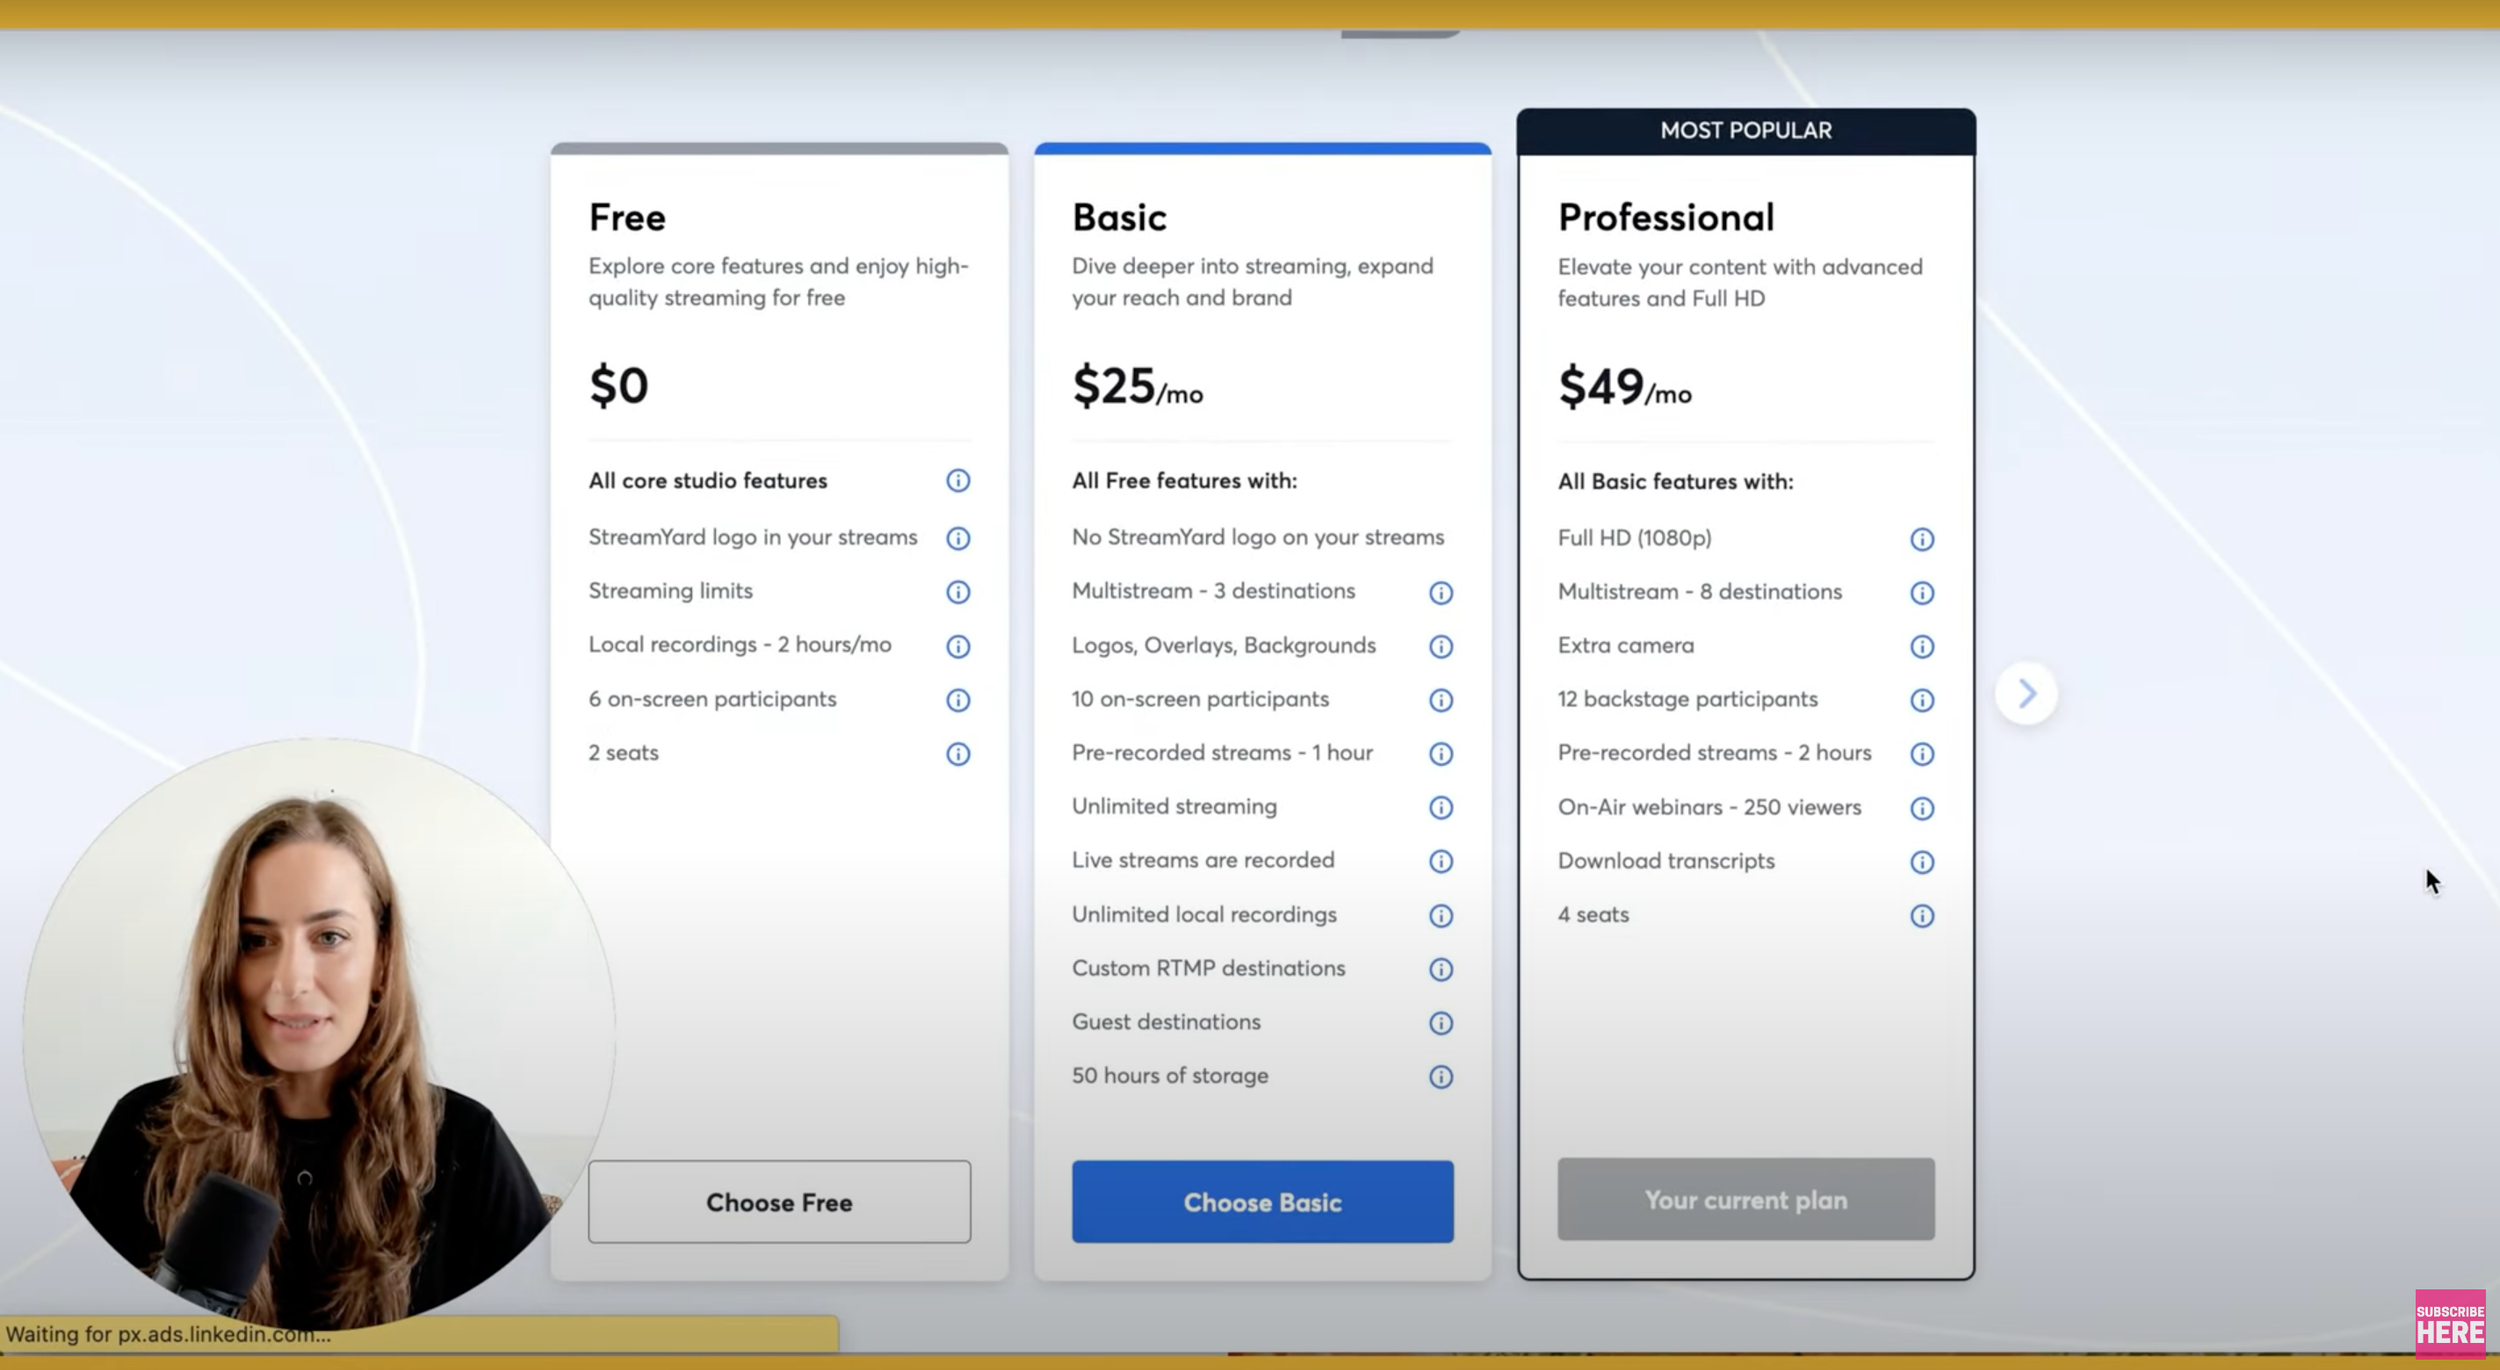
And as you can see, there is a free plan, which is great! The only thing is you will have their logo in your streams. If you want to upgrade it to "basic", then that will go away - and, of course, you'll get more features as well. So cross compare this, but it's not too bad from free up to $49 a month.
Alright - now lets create your first training! ⚡️
To get started, you're just going to click "create", and then "on-air webinar".
Next, you're going to put the title and a description.
And you can set up registration... but what I loved is that I didn't need this. If you already have people on your email list - which is what I recommend - you don't need them to then register again to watch the training. So I'm going to leave that off right now.
The live viewer limit is set to 250, so you can click "upgrade for more" if you need to upgrade your live for more viewers that.
Then you're going to schedule your start time. Let's just say, for example, that I'm going to do it today at one o'clock.
And then you can upload a thumbnail as well. So I will select my thumbnail and I'm going to hit "apply", and then "create".
Now that this is created you're going to see this in your list of streams and recordings:
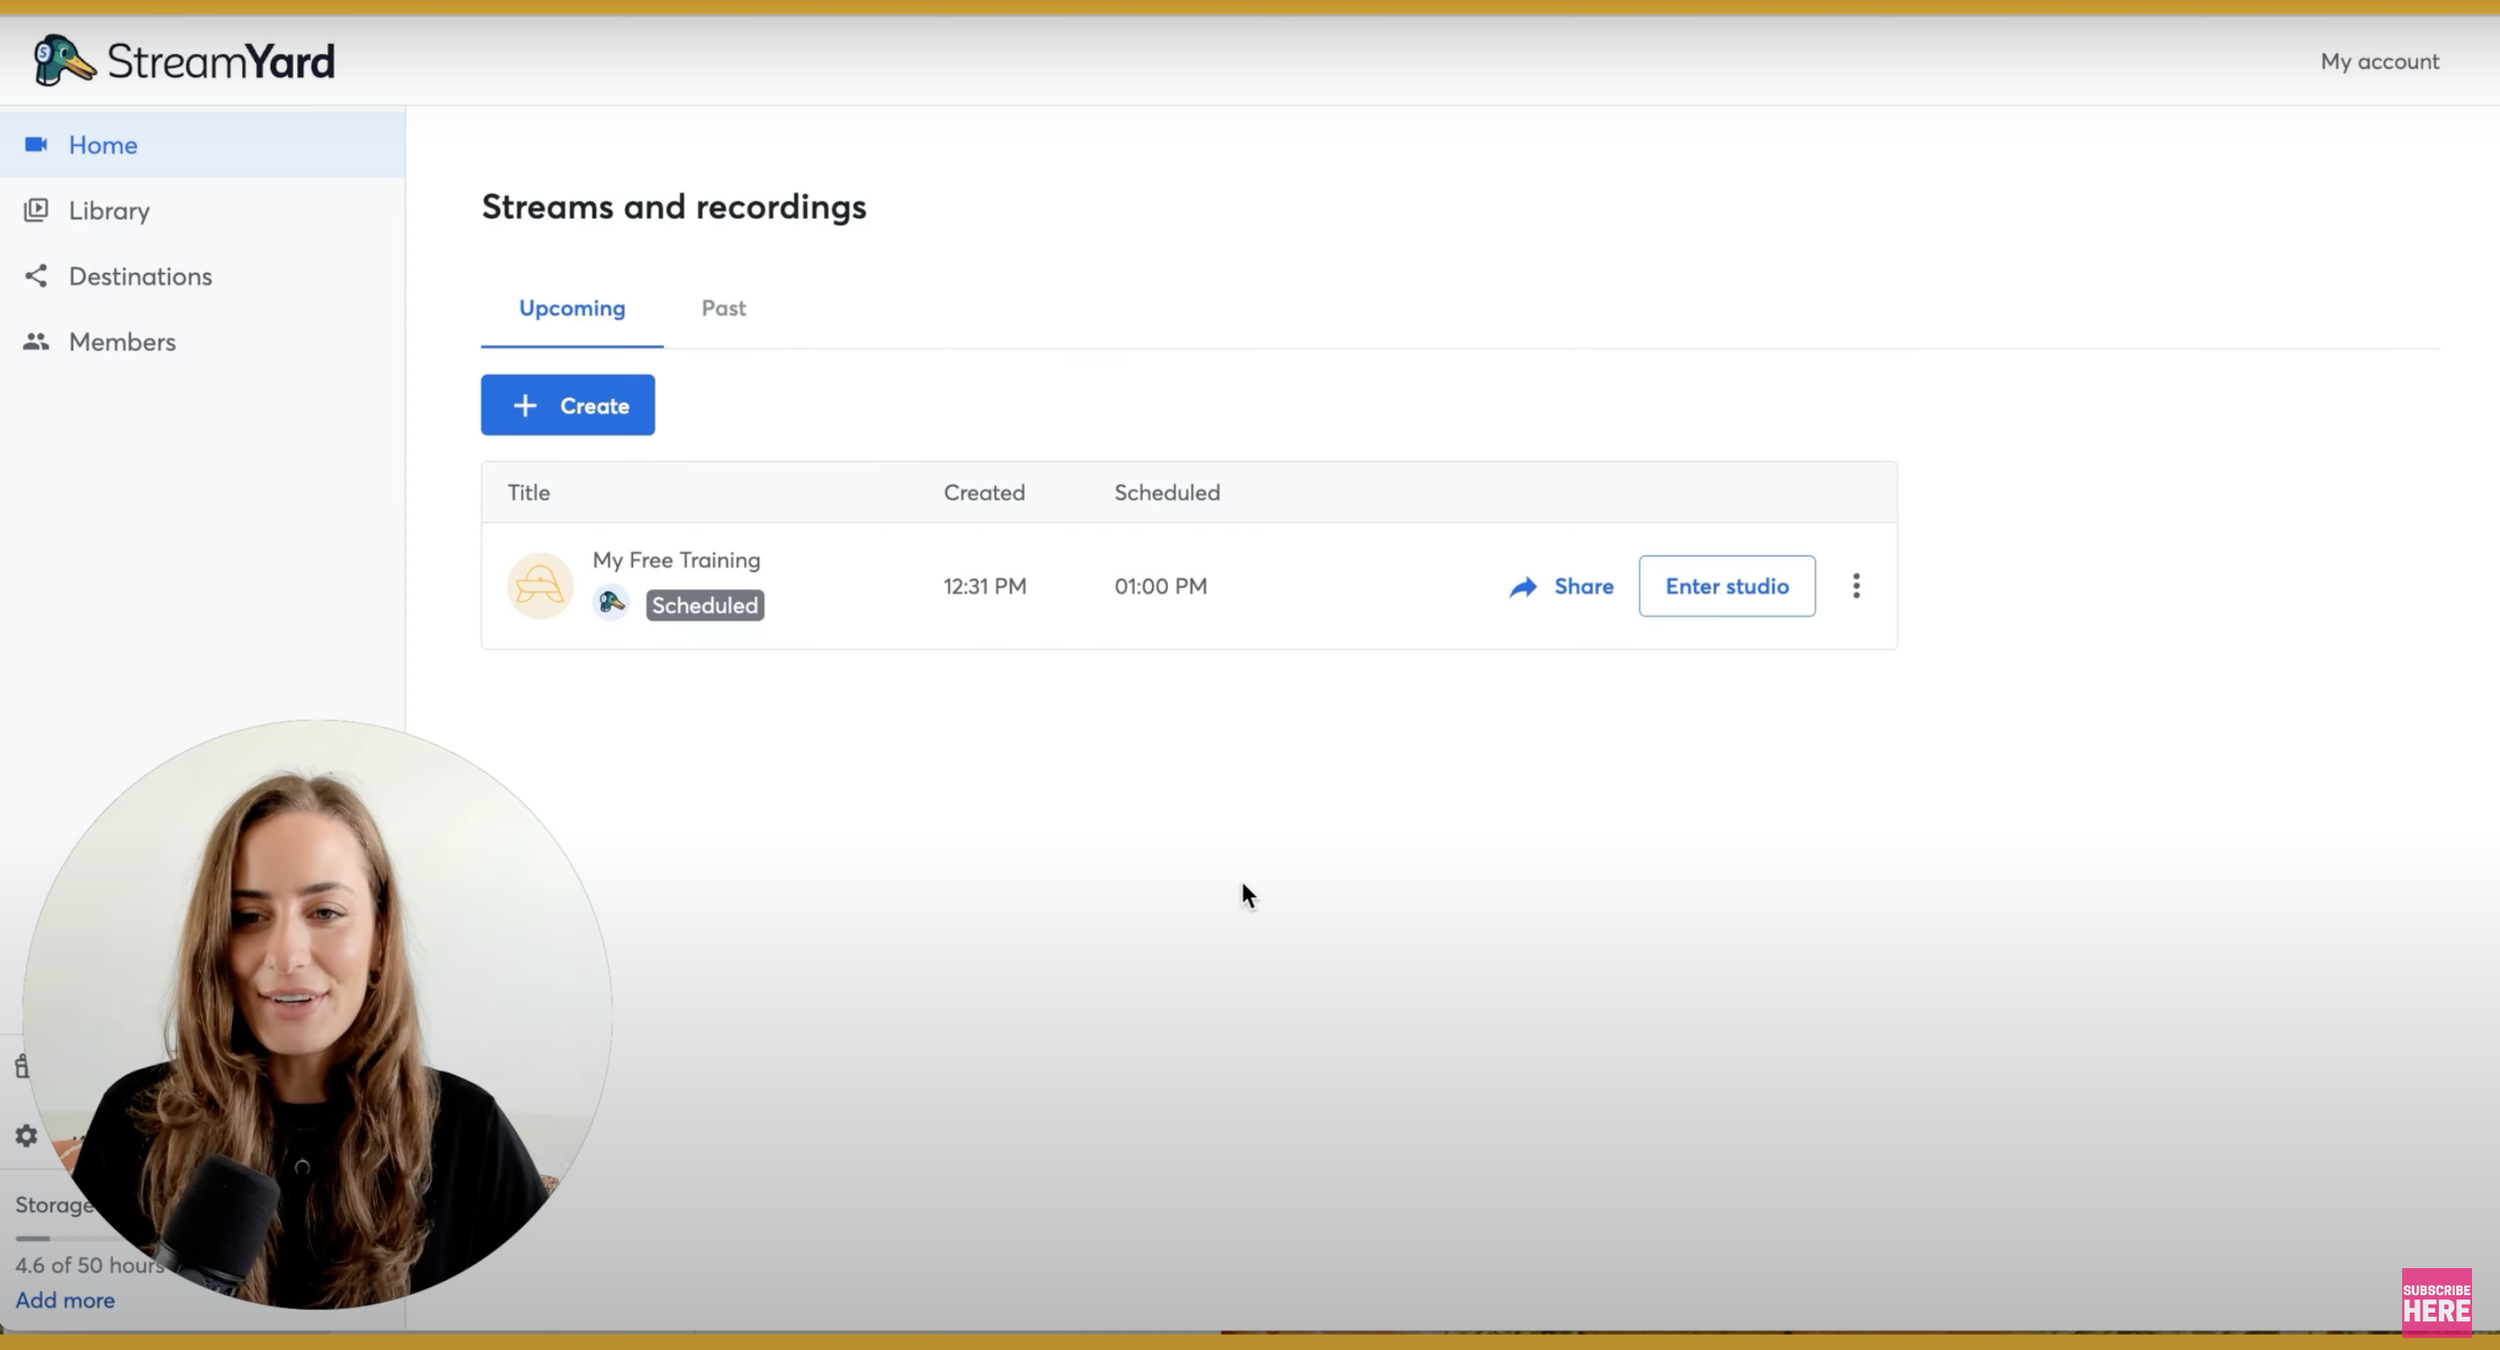
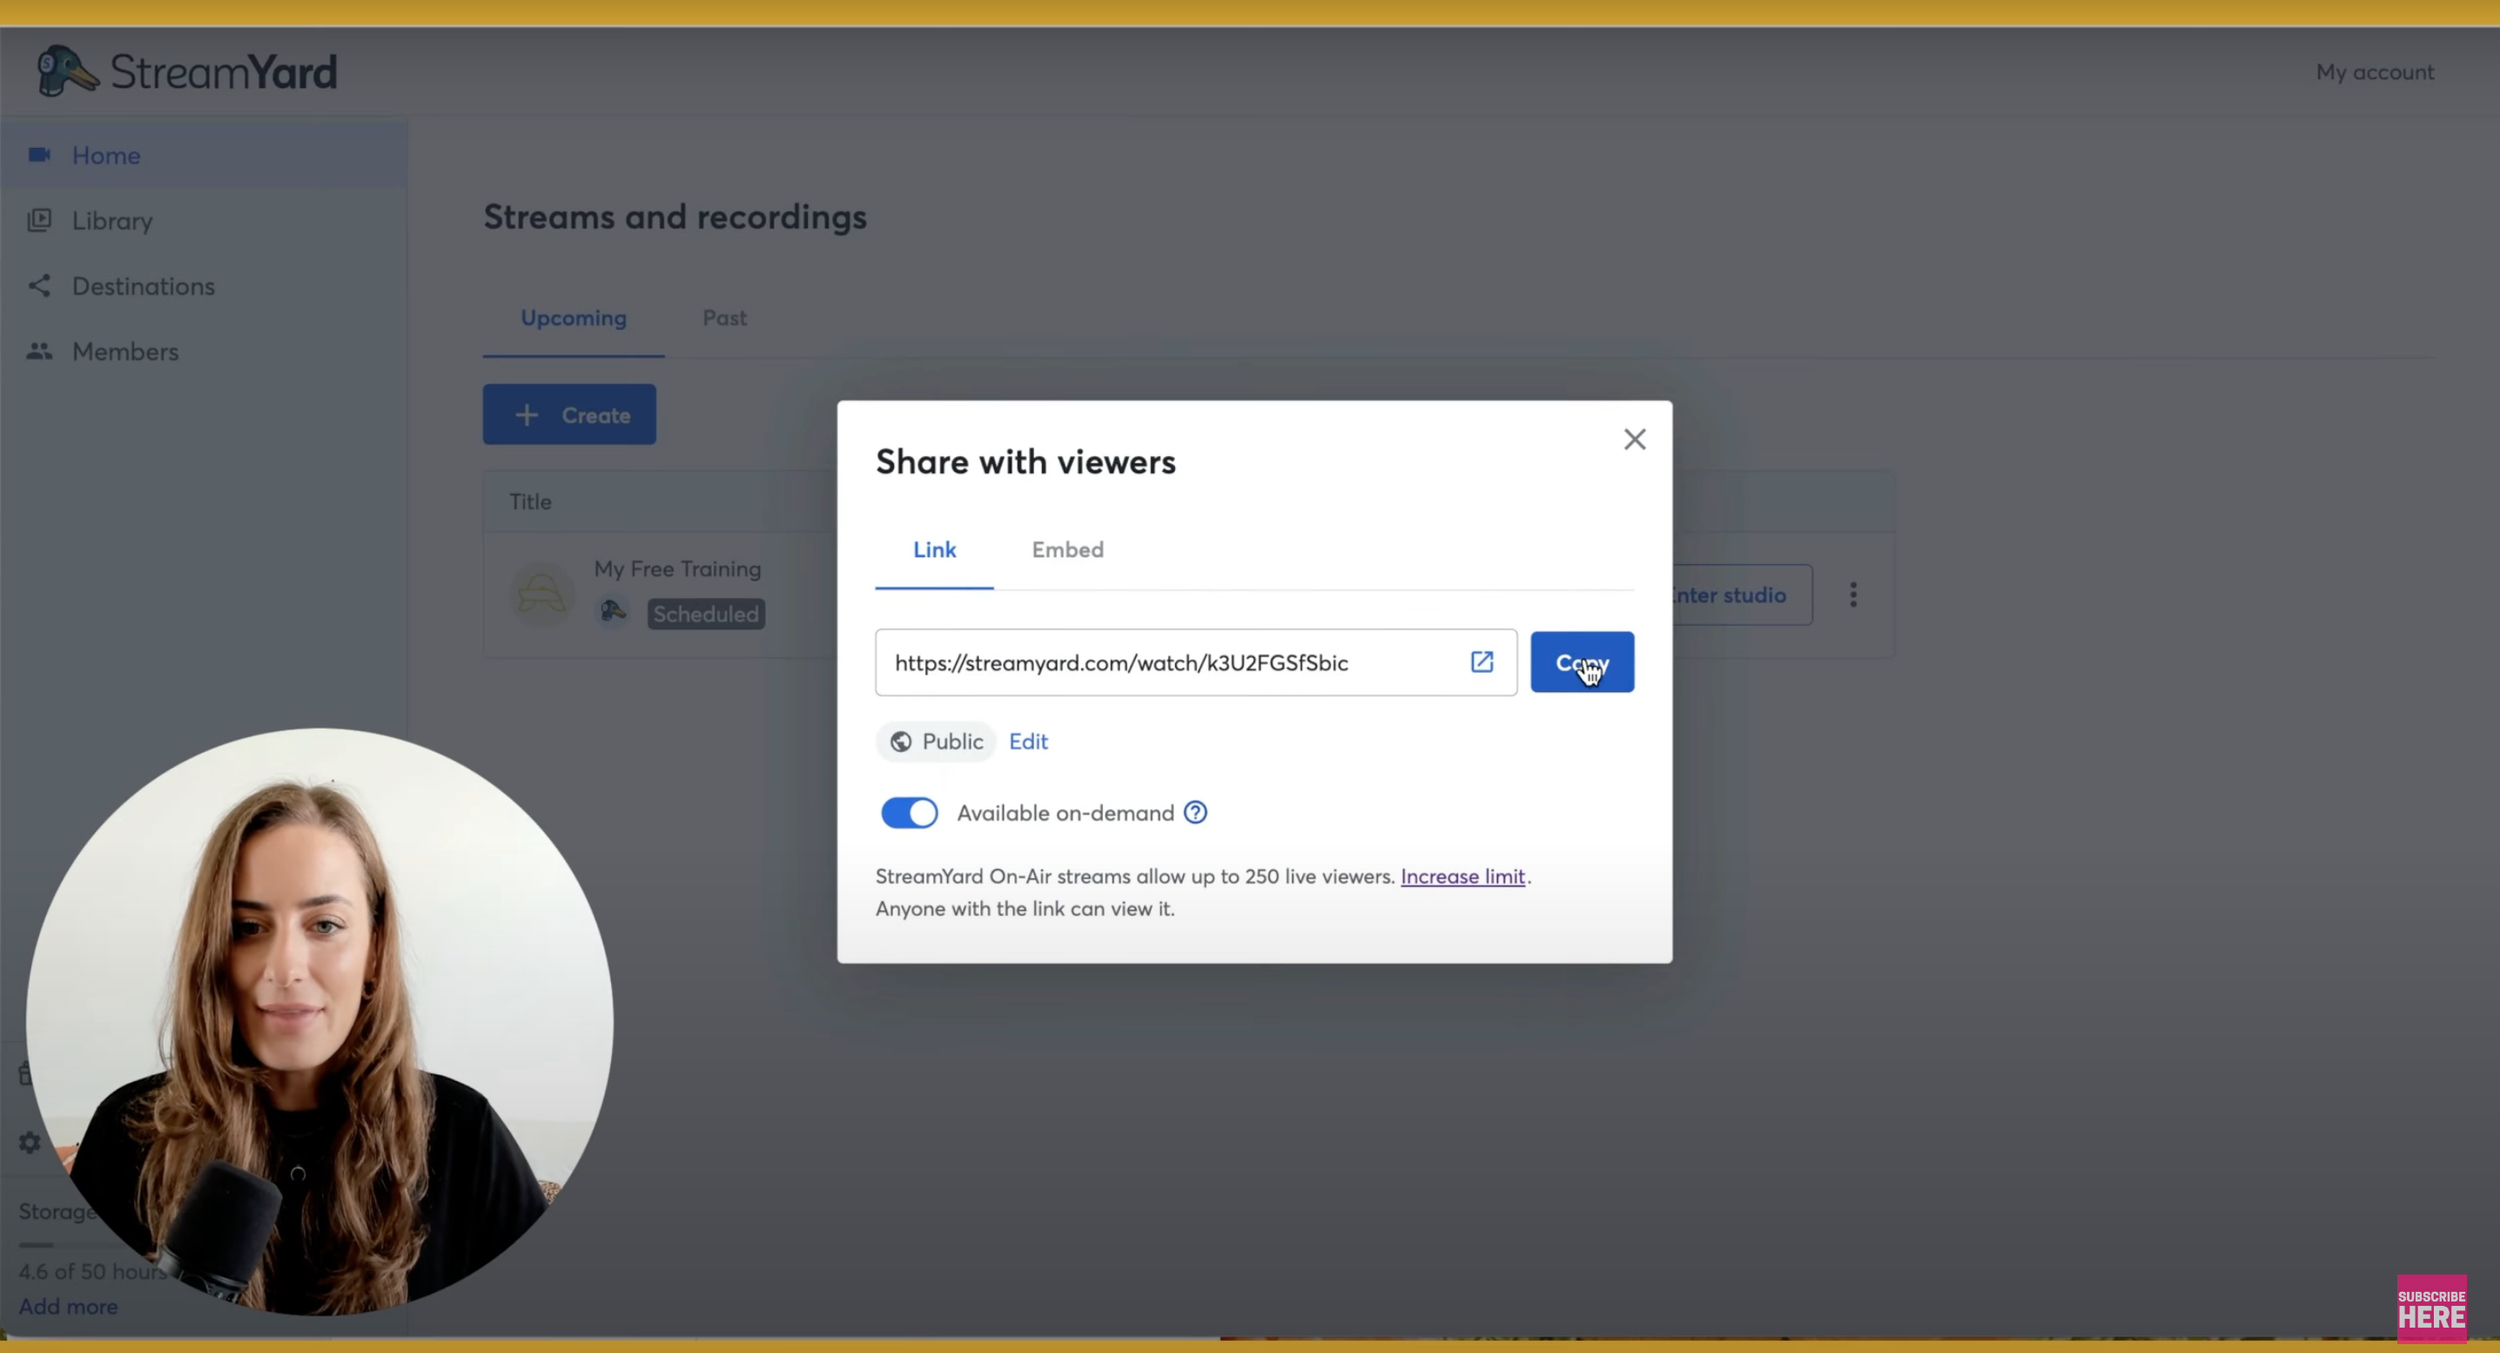
To share the link with all of your clients, you're going to click "share" and then copy this link here:
And this is what they will see:
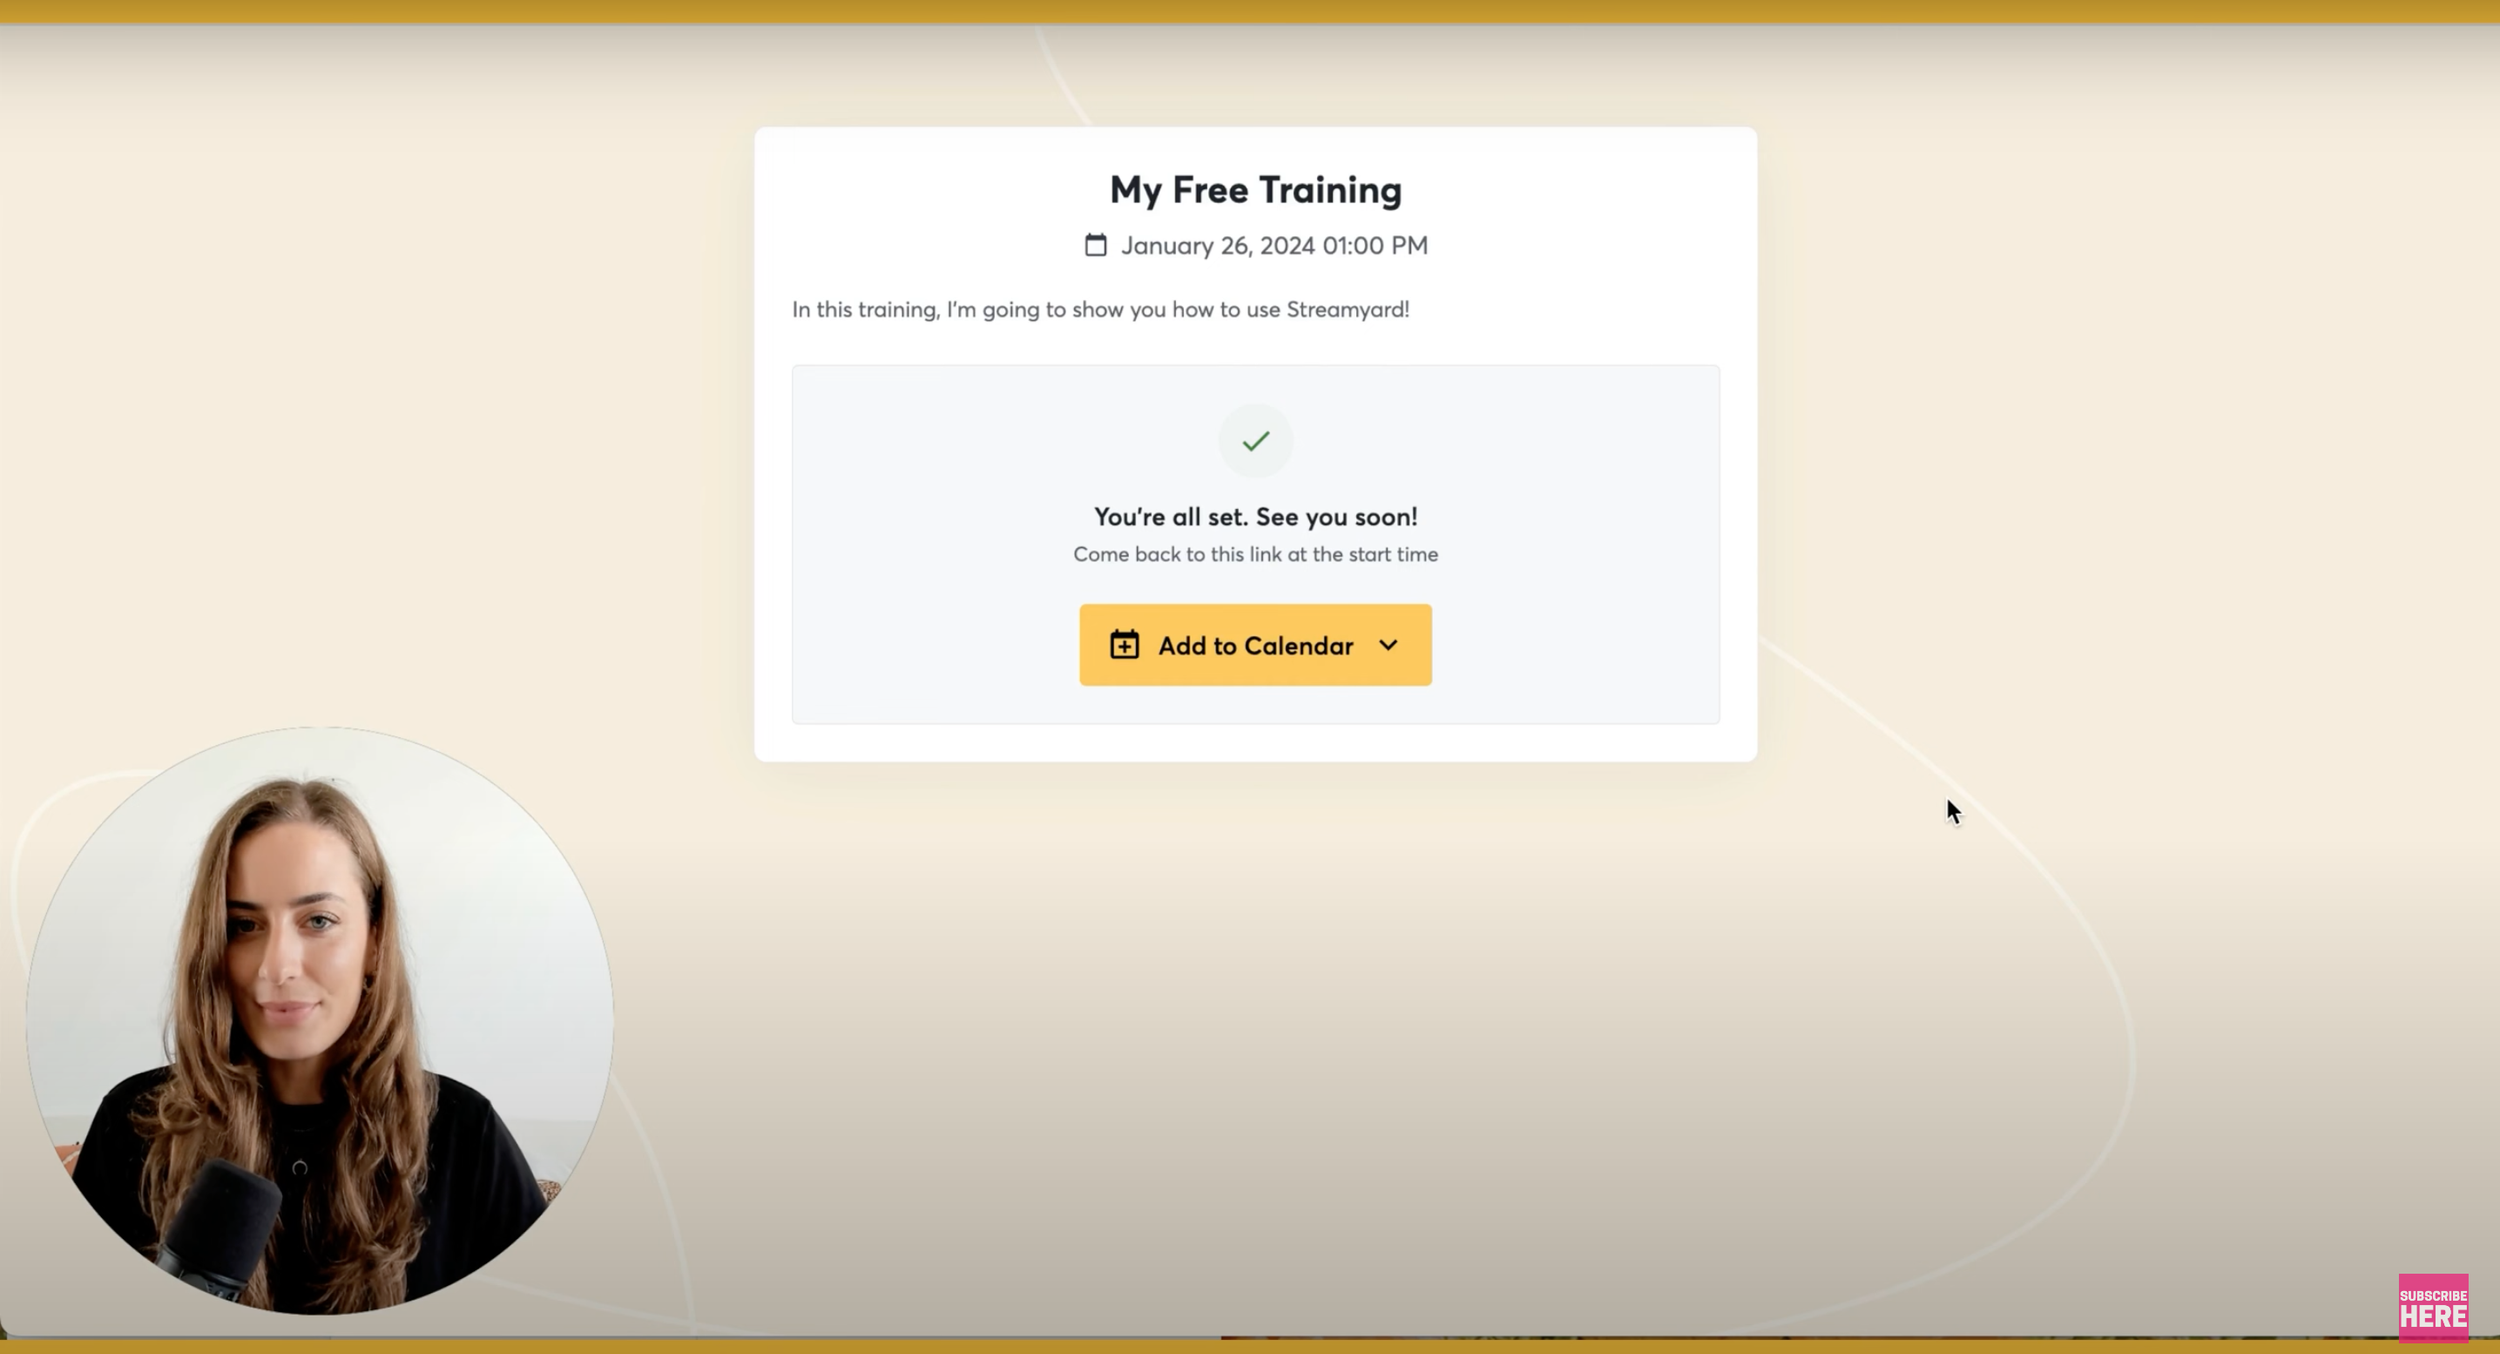
Okay, so it looks really nice and simple! You can't really customize this too much, but I think that's totally fine.
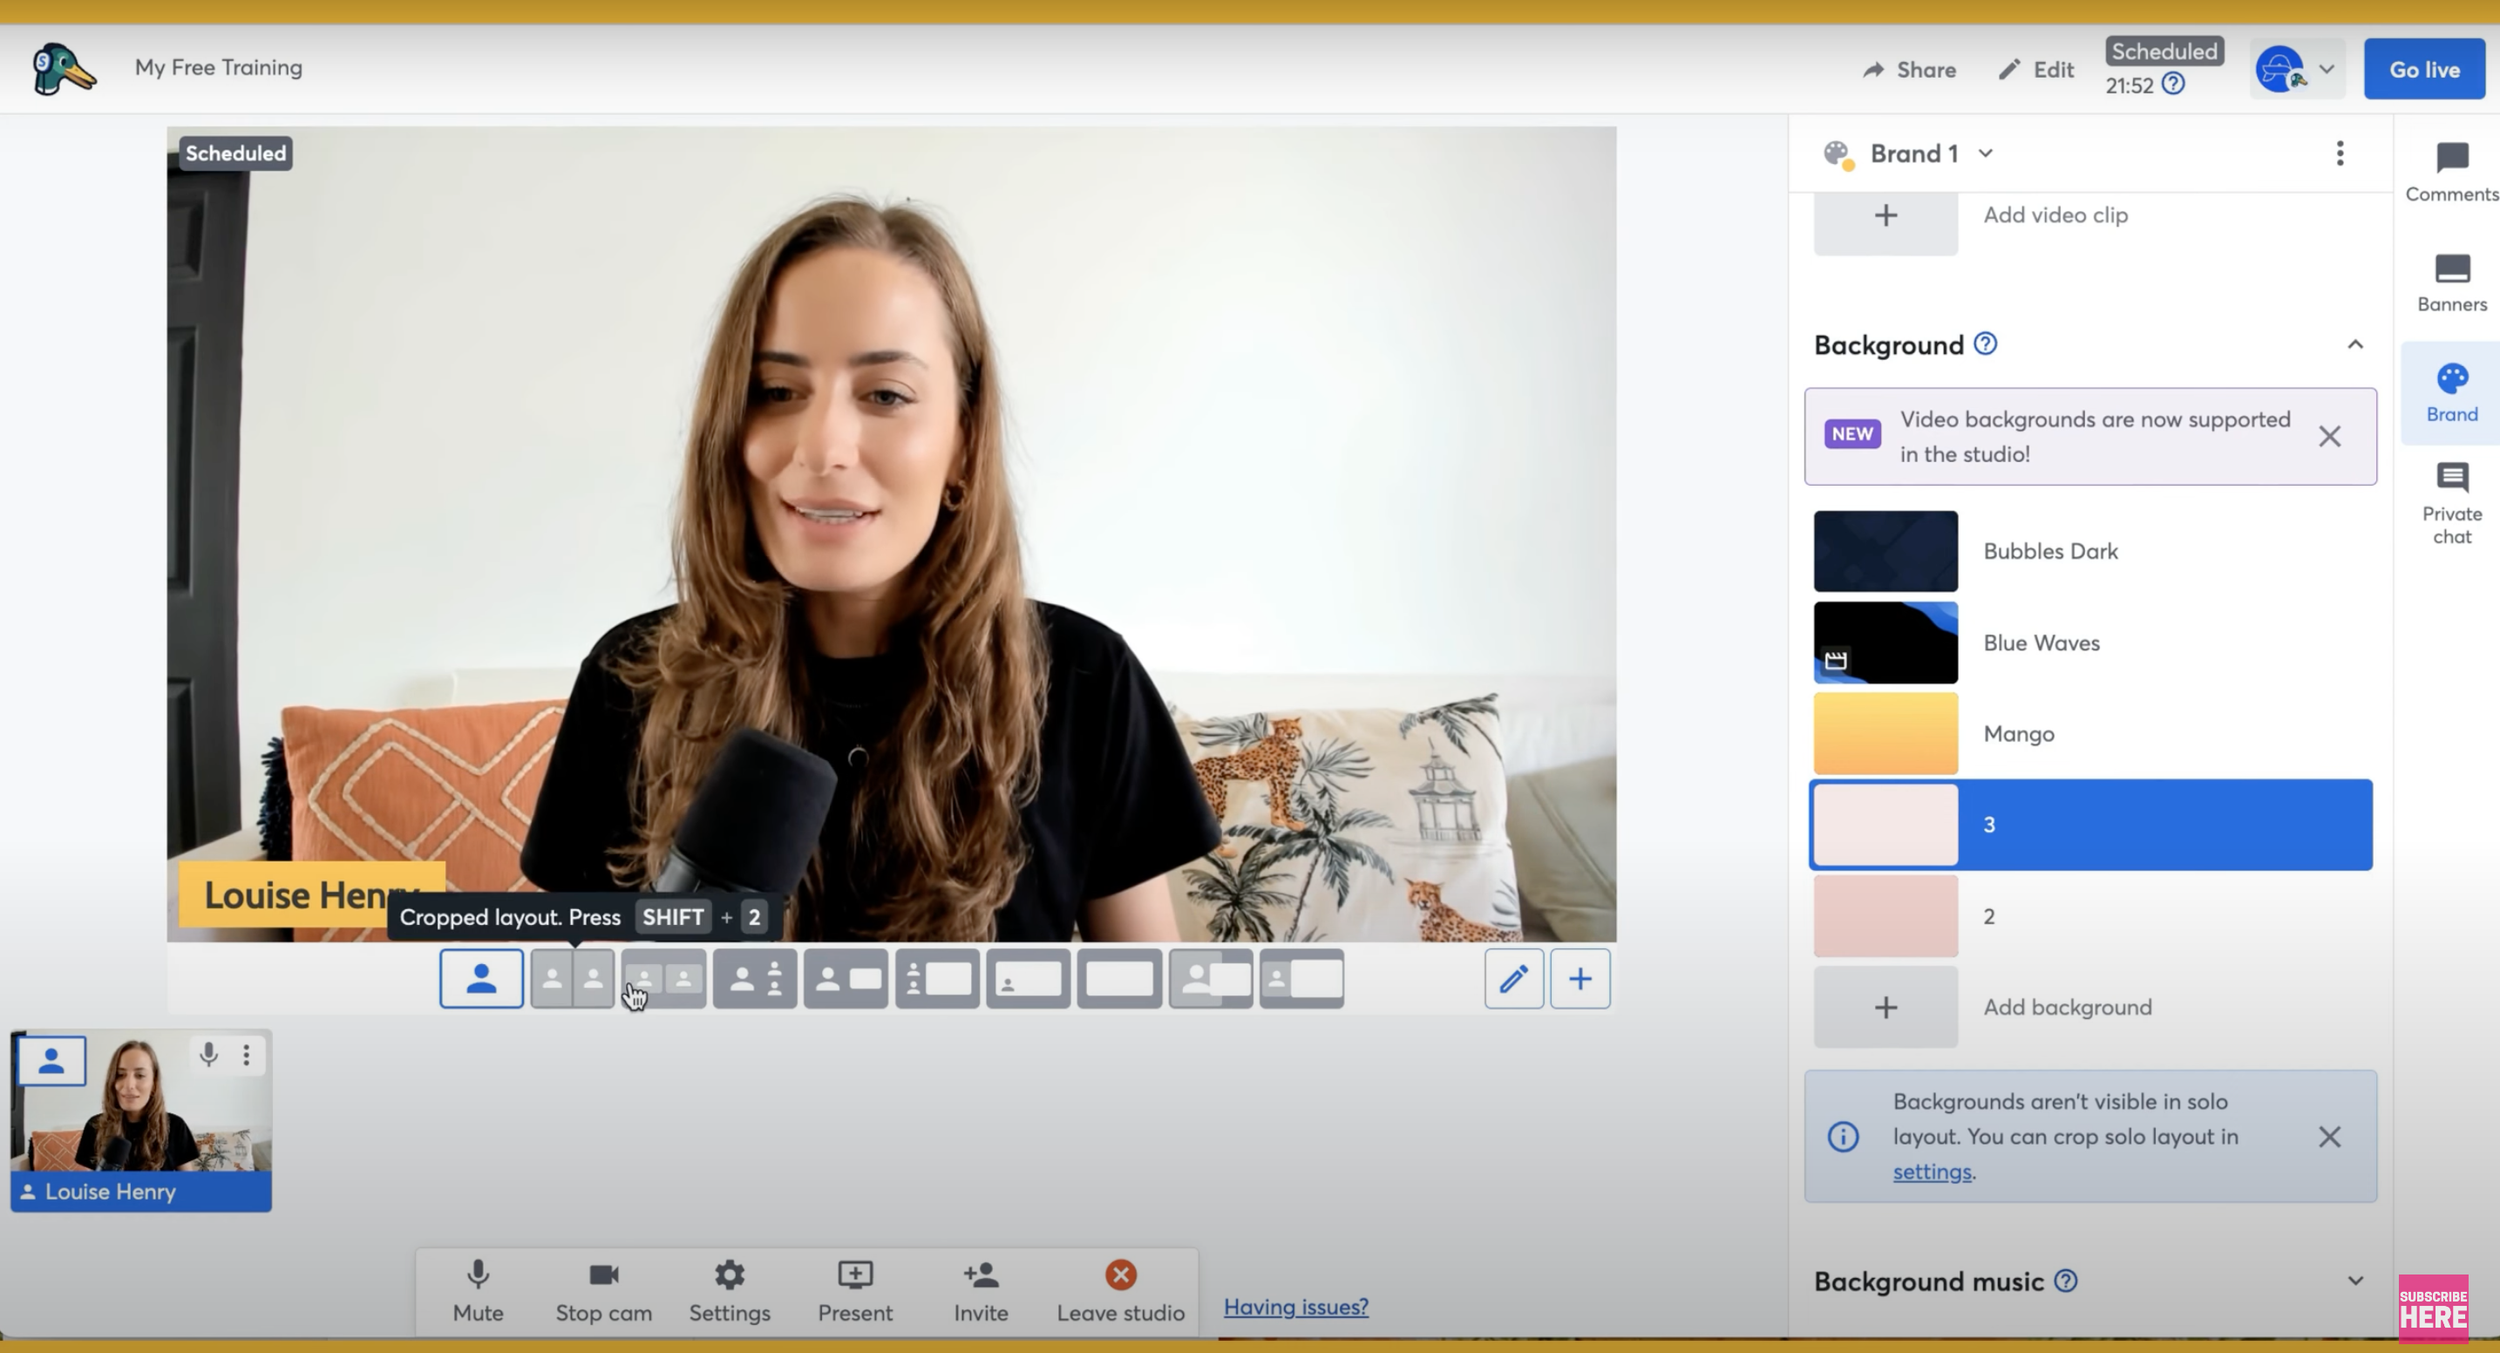
Now for you, as the presenter, you're going to click "enter studio", and then click "settings" and make sure that you are connected to the right camera. So I'm going to choose my webcam, and I'm going to adjust my background to make it look as nice as I can.
Then you can choose your camera resolution; I'd recommend 720p or higher.
Next, you're going to connect to your mic; so I would choose my Shure MV7 mic.
And that's all we need to do there!
Then you're going to type in your name, and click "enter studio".
So next, what you're going to do is hover over you on video and click, "add to stage".
Then if you go over here to "brand", and you'll see all the different ways that you can customize your stream:
I would recommend putting in one of your hex colors (so you'll just paste in that code)
You can choose the theme
You can upload your logo if you want, but what I actually did was I created these overlays in Canva, and you can simply click "add overlay" to upload that. Once you upload it, all you have to do is hover over it and click "show" and that will be added to the top of your video. I was hosting a free live training this week, and so for all the different days I would show what day it was (for the overlay), so you could do that, too!
You can also upload video clips to play.
You can adjust the background color (that's what I added here as well).
So now in terms of display, you'll see that you have all options along the bottom of your video:
If there was two of you, you could use the display for that one. If you had slides, you could use that layout.
Let's go ahead and present some slides... you're going to go down to "present", and then "slides" and click "your computer" to upload a file. You'll want to upload a PDF file of your slides. I've already done that so now let's click present, and then "slides" and you can see my files here, and now you can go through and see the different layouts and adjust the slides if you want.
So you actually have a ton of options, which I really like.
I really like how custom you can make this livestream look.
What I ended up doing is creating this custom layout here:

If you click on the pencil icon, you can actually move the items around and get that looking how you want it.
I set my layout here and then I added on my little overlay, and this is what my training looked like:

Okay, so you can customize this for your brand however you want.
And when you're presenting your slides, all you have to do is use the arrows on your keyboard to go through your different slides - which has been so nice and easy to use as well as a presenter. So I'm a huge fan of that feature, too.
Now, let's say you are done with your slides... you're just going to hover over them and click "remove" and then you're going to change the layout again.
You can also share your screen as well. If you click "present", you'll see "share screen". I used this to teach some different tech tutorials, so you can certainly do that as well. Then when I was done, I just hit "remove" there.
Alright, now let's say you're ready to go live. You're just going to go over here to "comments" so you can see all of the comments that come in. Then you're going to click "go live", and then "go live" (again).
Perfect - and now you are live and all of the comments are going to come in here on the right!
And as I mentioned before, from the user's perspective, it's really nice and simple. So let's go ahead and show you the user's point of view, or the client's point of view.
This is what it looks like:

And then all your client has to do is click "join the chat" and enter in their first and last name to join the chat - but, they could watch the video either way without doing this part if they don't want to participate in the chat.
So if you two have been experimenting with different softwares, I think you are absolutely going to love this one and be near-obsessed.
Then, what's also cool is that as the comments come in, you can actually hover over it and click show and they will come up on screen:

This really made it feel like a community event where we were having a back and forth conversation. I really love that and used that throughout my training each day. And, not only can you show it on screen, but you can also react to the comment with an emoji, which is fun, or you can star particular comments if needed.
On top of this, you can also add banners. So if you click "create banner" and then type "Join the program now!", for example, then click "add banner" and then you can also show that on screen. So that is pretty cool.
Here is an example:

Alright, so that is Streamyard! I absolutely love it.
Of course, go into their studio mode and just practice with it for a bit and get comfortable switching between the different views and everything before going live yourself.
Overall though, it was really great and I used it all week for my free event.
I also love…
Now what's cool is not only can you just stream right here in this webinar room but you could also choose to stream two different destinations at the same time. For example, I could have also been streaming live to my Facebook page, or a Facebook group, Linkedin, or Instagram live.
How handy is that? It allows you to expand your reach and be streaming all of your different platforms at the same time.
So that is my training on how to use Streamyard.
I hope that this was so helpful for you and that you can now go and connect with your audience through live video.
Pin this!

GET YOUR FREE TRAINING HERE:

![8 Simple Productivity Habits 🍃 [Working From Home Tips]](https://images.squarespace-cdn.com/content/v1/5696066f1115e0e4e3059106/1754827471549-ZKNAPAMQKEENQ4EBZ8IG/simple-productivity-habits-thumbnail.jpg)


![Kajabi Review 2025 - What You Need to Know Before You Buy! [Kajabi Pros & Cons]](https://images.squarespace-cdn.com/content/v1/5696066f1115e0e4e3059106/1747073445742-LIZROCCY37VZHY8DRA4K/Kajabi-review-2025-thumbnail.png)

In this video, I’ll show you step-by-step how to capture emails directly inside Instagram DMs using Manychat - no landing page required 🤯