How to Add the Facebook Pixel to a Squarespace Website
Heads up: I use affiliate links for my fave products. If you click and purchase, I may receive a small commission at no extra cost to you.
Learn how to easily add the Facebook Pixel to a Squarespace website in this tutorial!
CLICK PLAY OR READ THE BLOG POST BELOW:
Video transcript:
How to Add the Facebook Pixel to a Squarespace Website
Today you'll learn how to install the Facebook pixel on your Squarespace website and I am super excited because I have Facebook ads expert and funnel strategist Jessica Tutton here to show us how it's done.
So if you want to get started with Facebook ads, this is definitely step number one. And even if you're not quite feeling ready yet, that's totally fine. I still recommend that you watch this video and install the pixel so that Facebook can start gathering data for you. Then when you're ready you can retarget your website visitors with the information that has been collected for you.
So like all videos on this channel, Jessica has made this a nice and easy for us! If you would like more tech tutorials to help you grow your online business, definitely subscribe to my youtube channel.
Here's Jessica now with how to install your Facebook pixel to your Squarespace website:
Hi guys, I'm Jessica Tutton and in this video I'm going to show you how to install your Facebook tracking pixel on your Squarespace website.
There are two main reasons why you want to have your pixel installed on your website.
The first is so that you can potentially deliver ads to people who have recently visited your website. That's what we call retargeting. And it's only possible when you put the pixel on your website, so Facebook can really start to track people who are visiting your web pages.
And the second reason you want to have your pixel on your website is so that you can start tracking conversions that happen on your website. So, tracking people who sign up for your lead magnet as a result of seeing your ad or even people who purchase from you as a result of seeing your ad.
The only way to determine how your ads are performing is to really track these metrics.
So it's a critical component to advertising on Facebook and it is super simple to get set up.
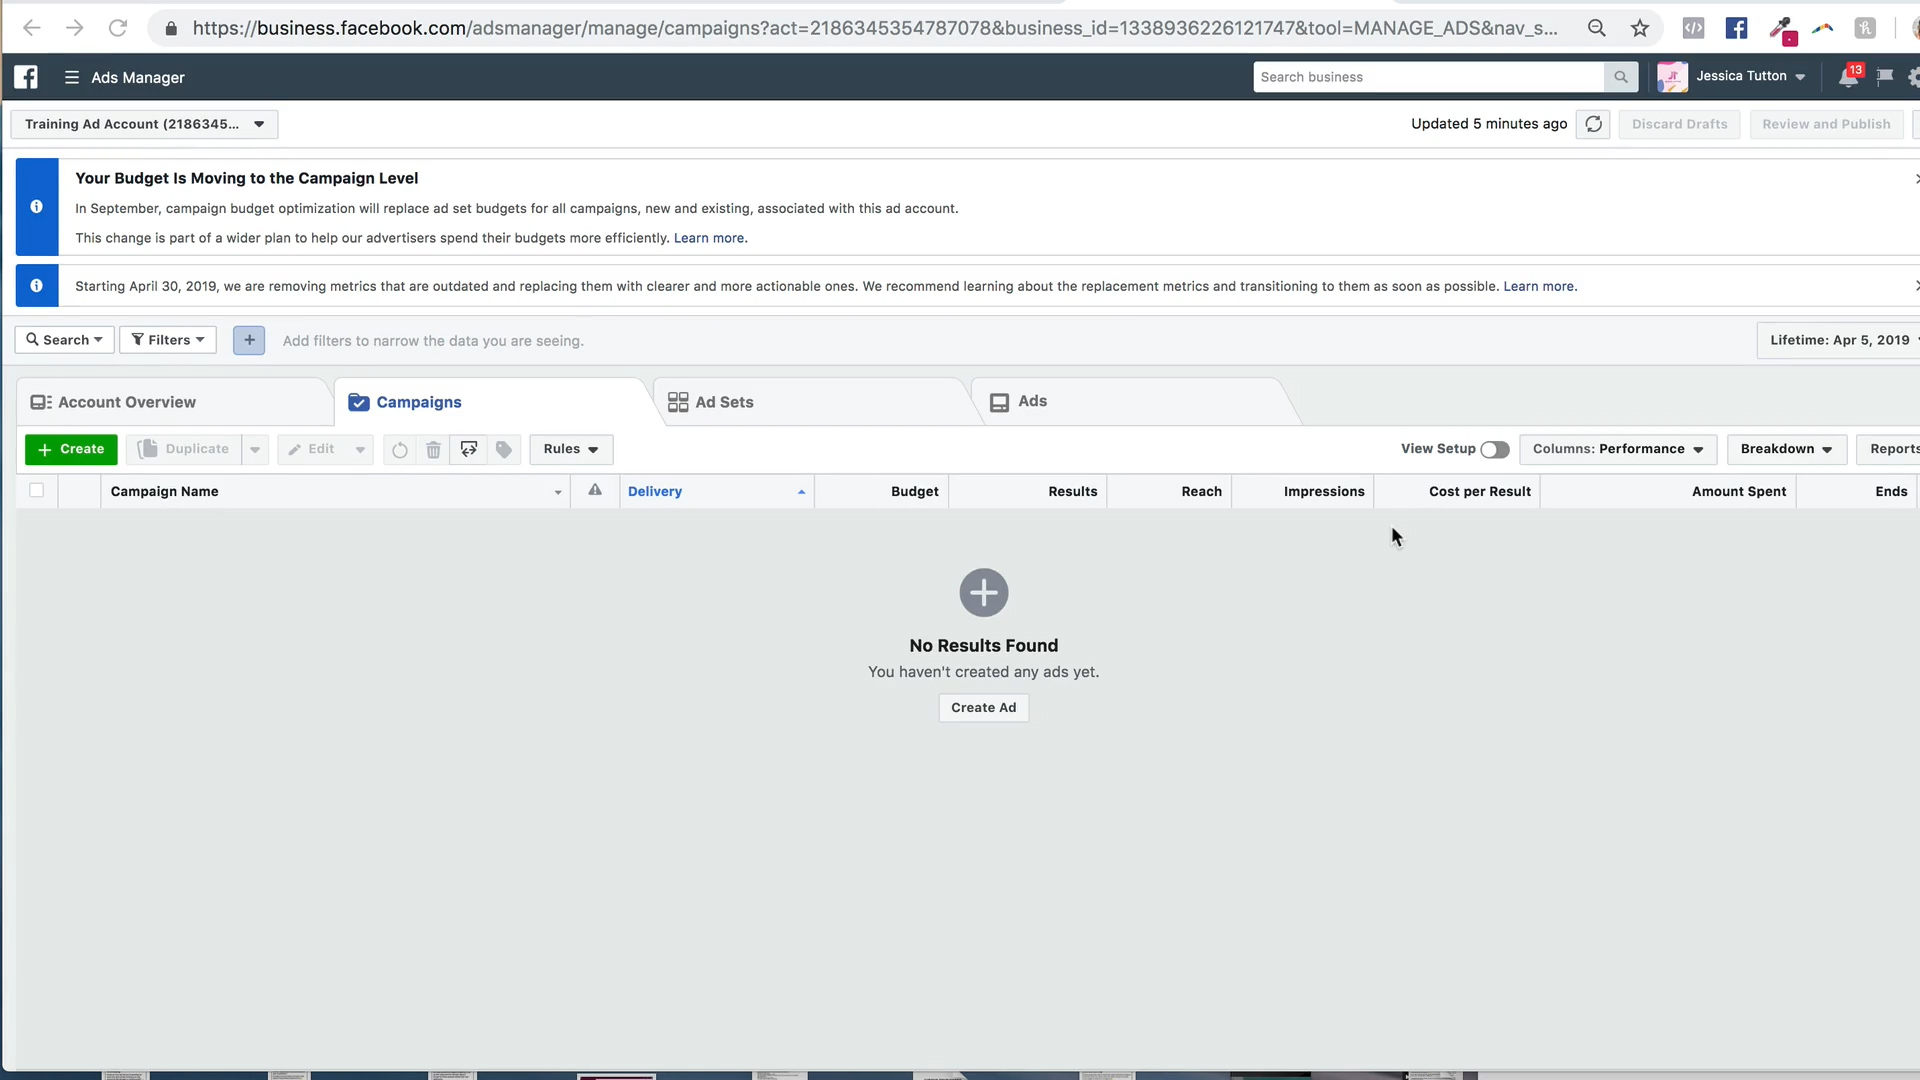
So the first thing you want to do is navigate to your Facebook ads manager dashboard, which is just this here.
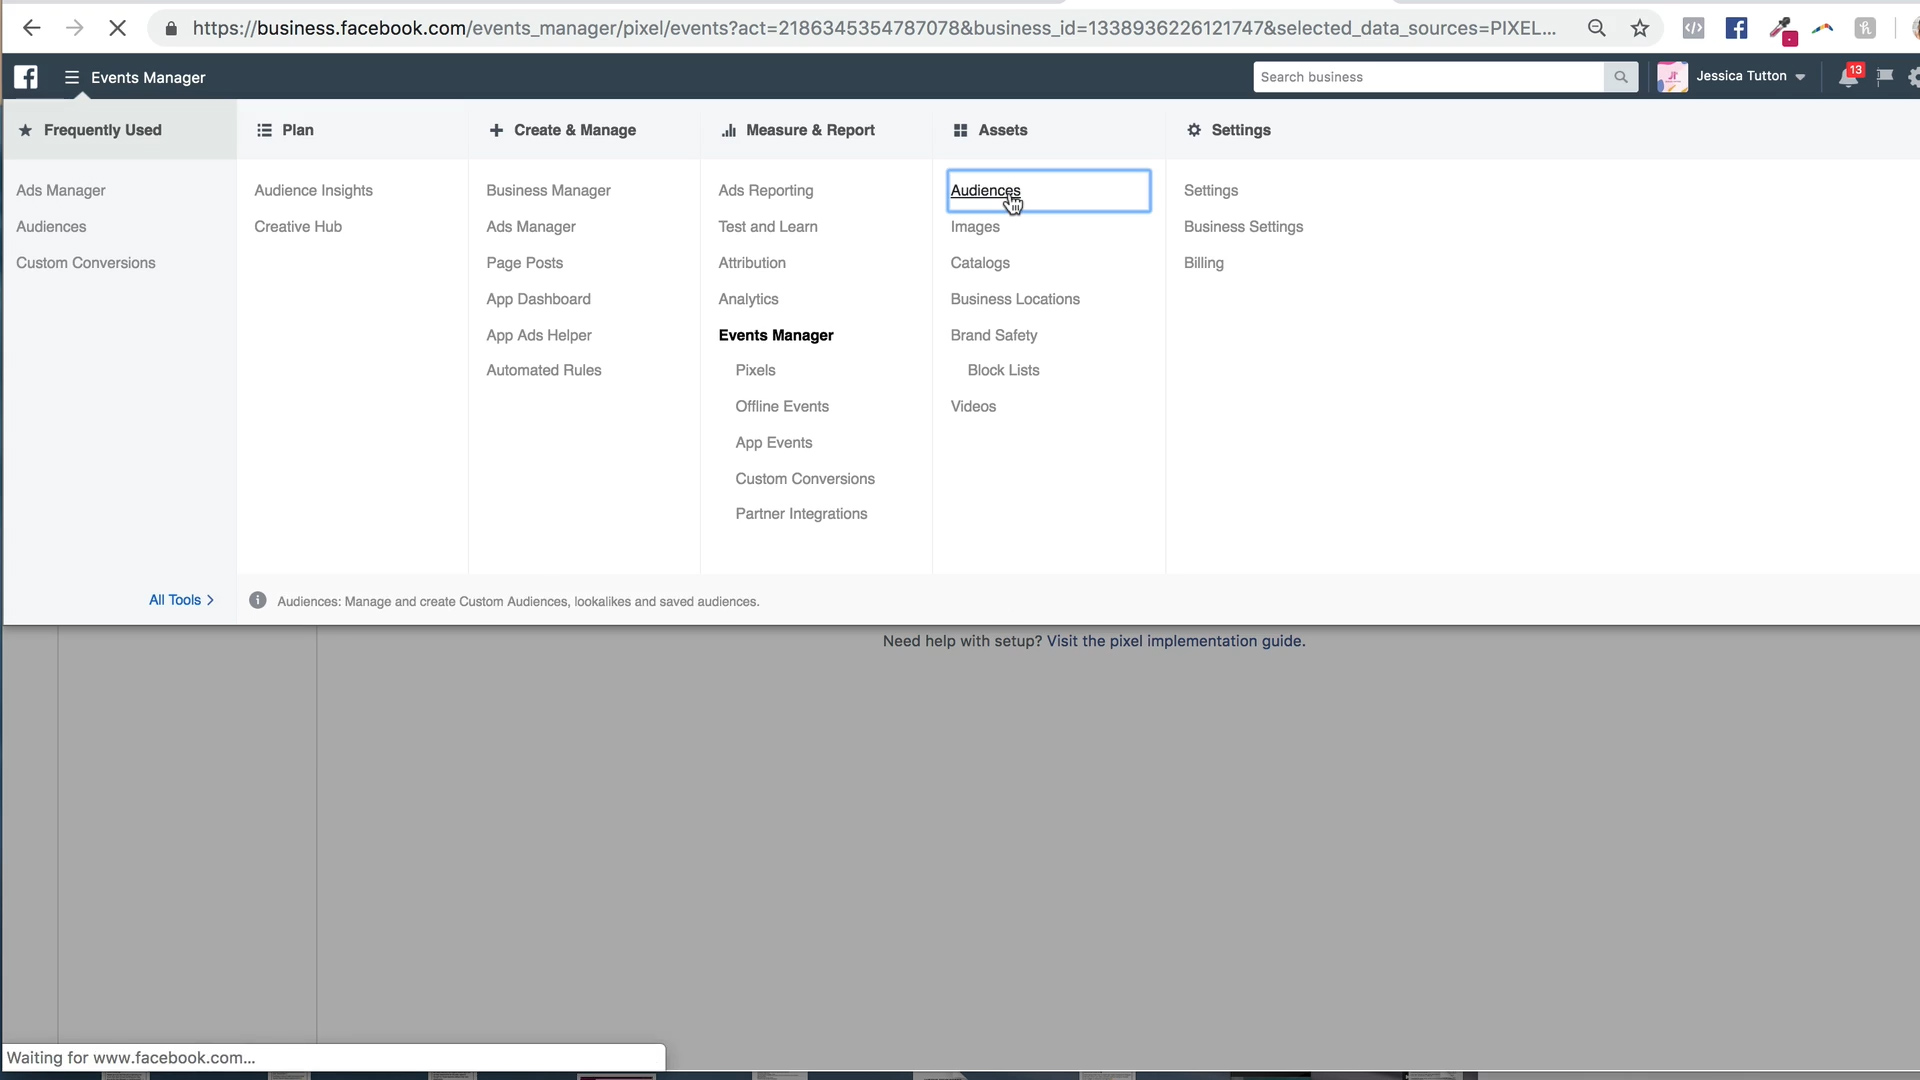
Navigate to the menu bar where it says ads manager. Then you want to scroll down to all tools. And under the measure and report column, you can go to pixels.
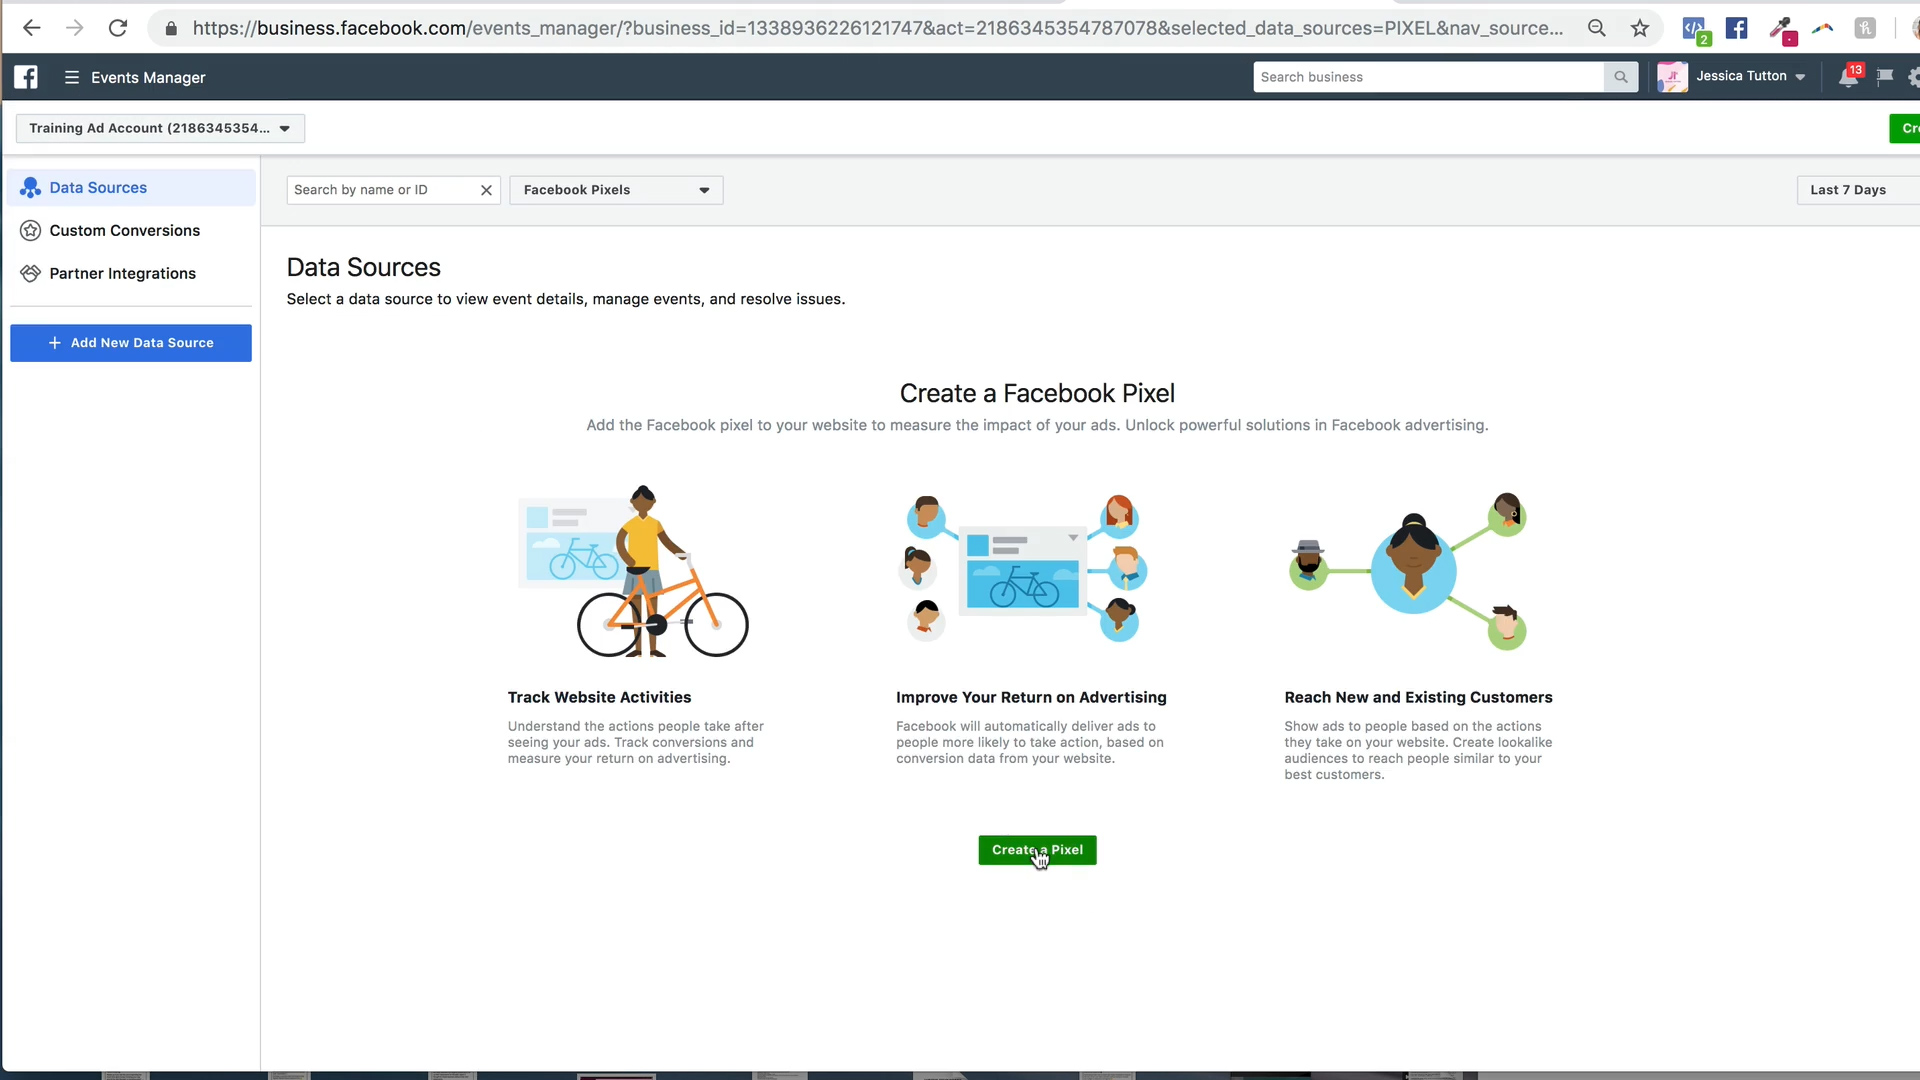
If you haven't yet created a Facebook pixel, it's as easy as clicking on this bright green button that says create a pixel and giving your pixel a name and then entering your website URL. And then you just click create and your pixel is created.
The next step is then installing it on your website. And we have three options when it comes to installing the pixel on our website.
We have:
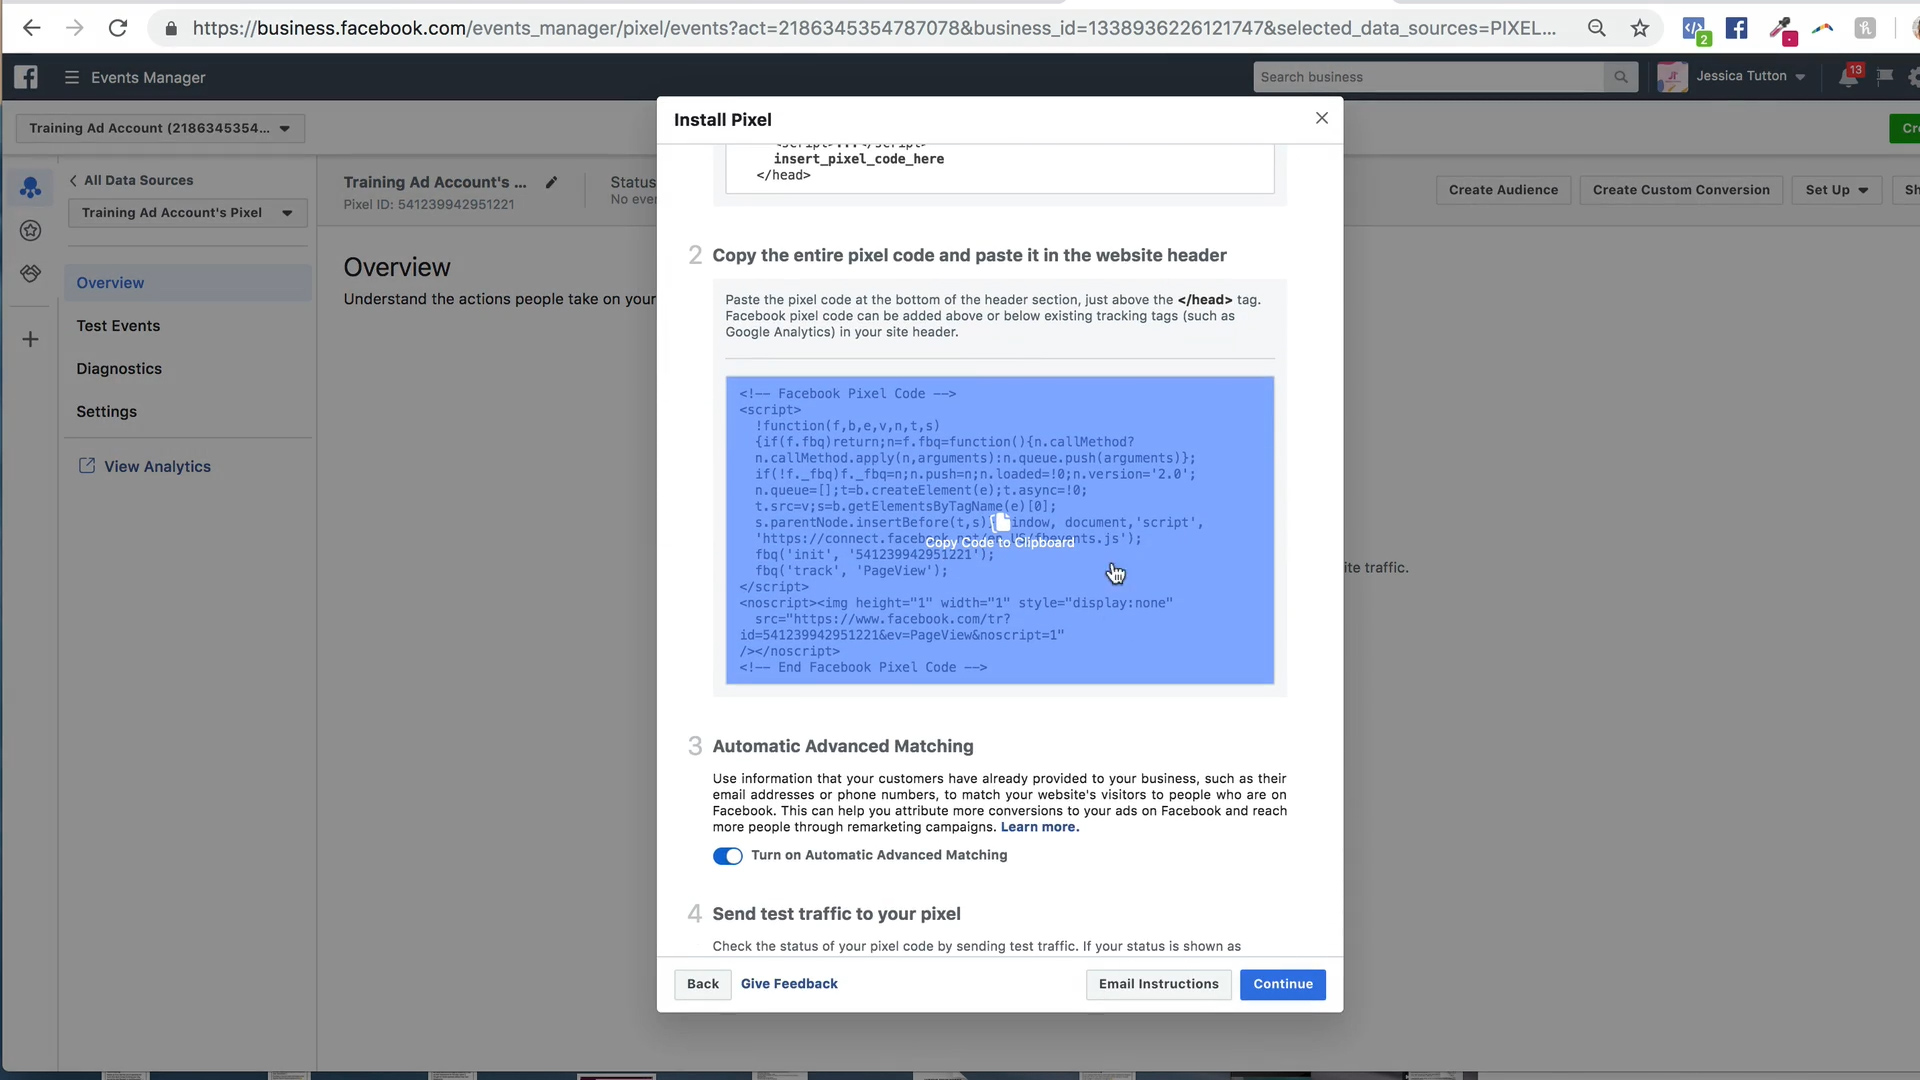
1. Manually installing the code yourself.
2. Sending the code to a developer to install for us.
3. Connecting to a partner program.
So if you have a program like Shopify, there's instructions on how to install your pixel.
But what we are going to do today is manually install the pixel code ourselves because you'll be surprised at just how easy it is!
Click on this middle option titled Manually Install Pixel Code Yourself and then scroll right down to copy the entire Pixel Code.
Once your pixel is copied, we're just going to jump onto your Squarespace website.
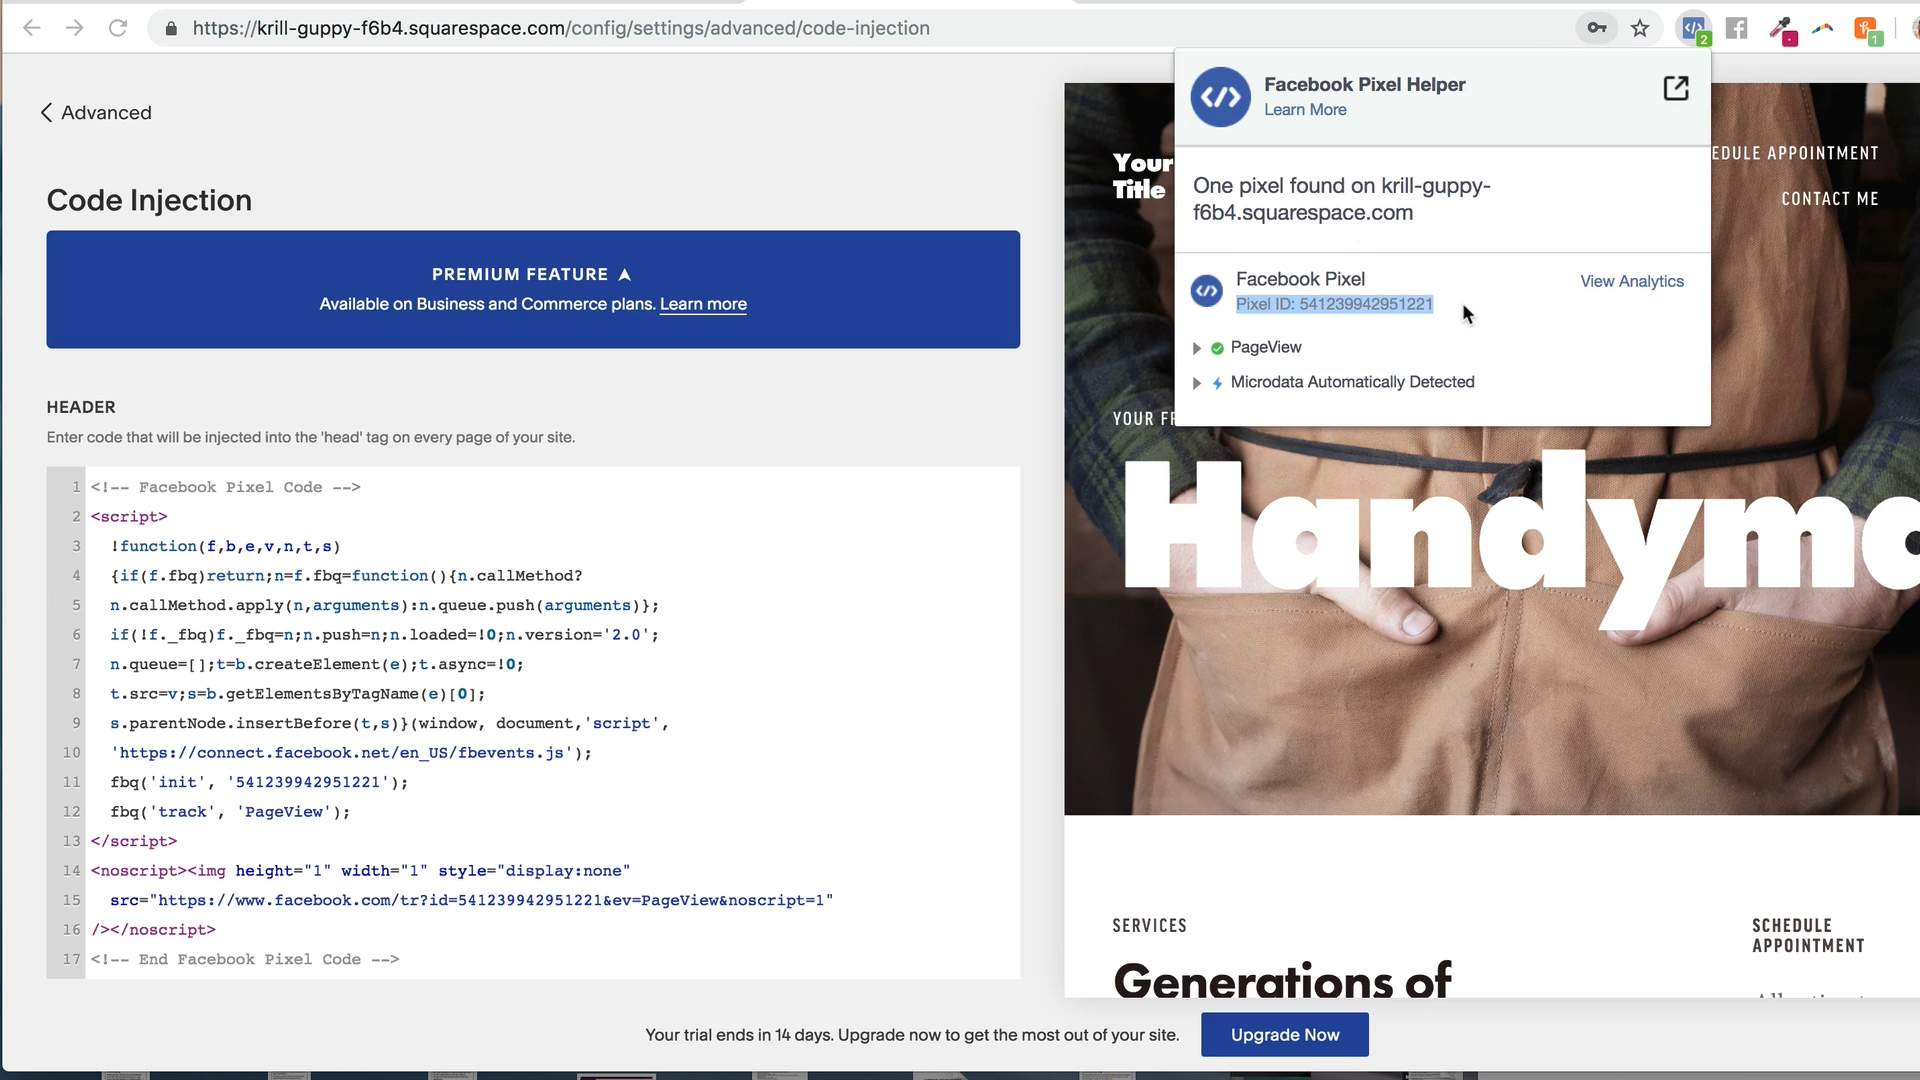
Log into your website and go to your Advanced Settings and then we're going to go into Code Injection. What we want to do is paste our Facebook tracking code into the Header section and then click Save.
So that is the pixel installed.
This is going to install the pixel on every single page and this process only needs to be done once 🙌
To make sure that your pixel is installed correctly you can download the Facebook Pixel Helper tool.
And then while on your website, you can just check to make sure the pixel is installed by clicking on the Facebook Pixel Helper.
And then you can see which Pixel ID is installed on your page and make sure that that Pixel ID matches your Pixel ID in your ads manager.
So that is how you install your pixel.
How to Create Custom Audiences
The next step once you have installed your pixel is creating your custom audiences. Because there's not much you can do with retargeting unless you actually create the audiences that Facebook will track for you.
So to create your custom audiences, we're going to go into your menu bar again, we're going to go to all tools and under assets we're going to click on audiences.
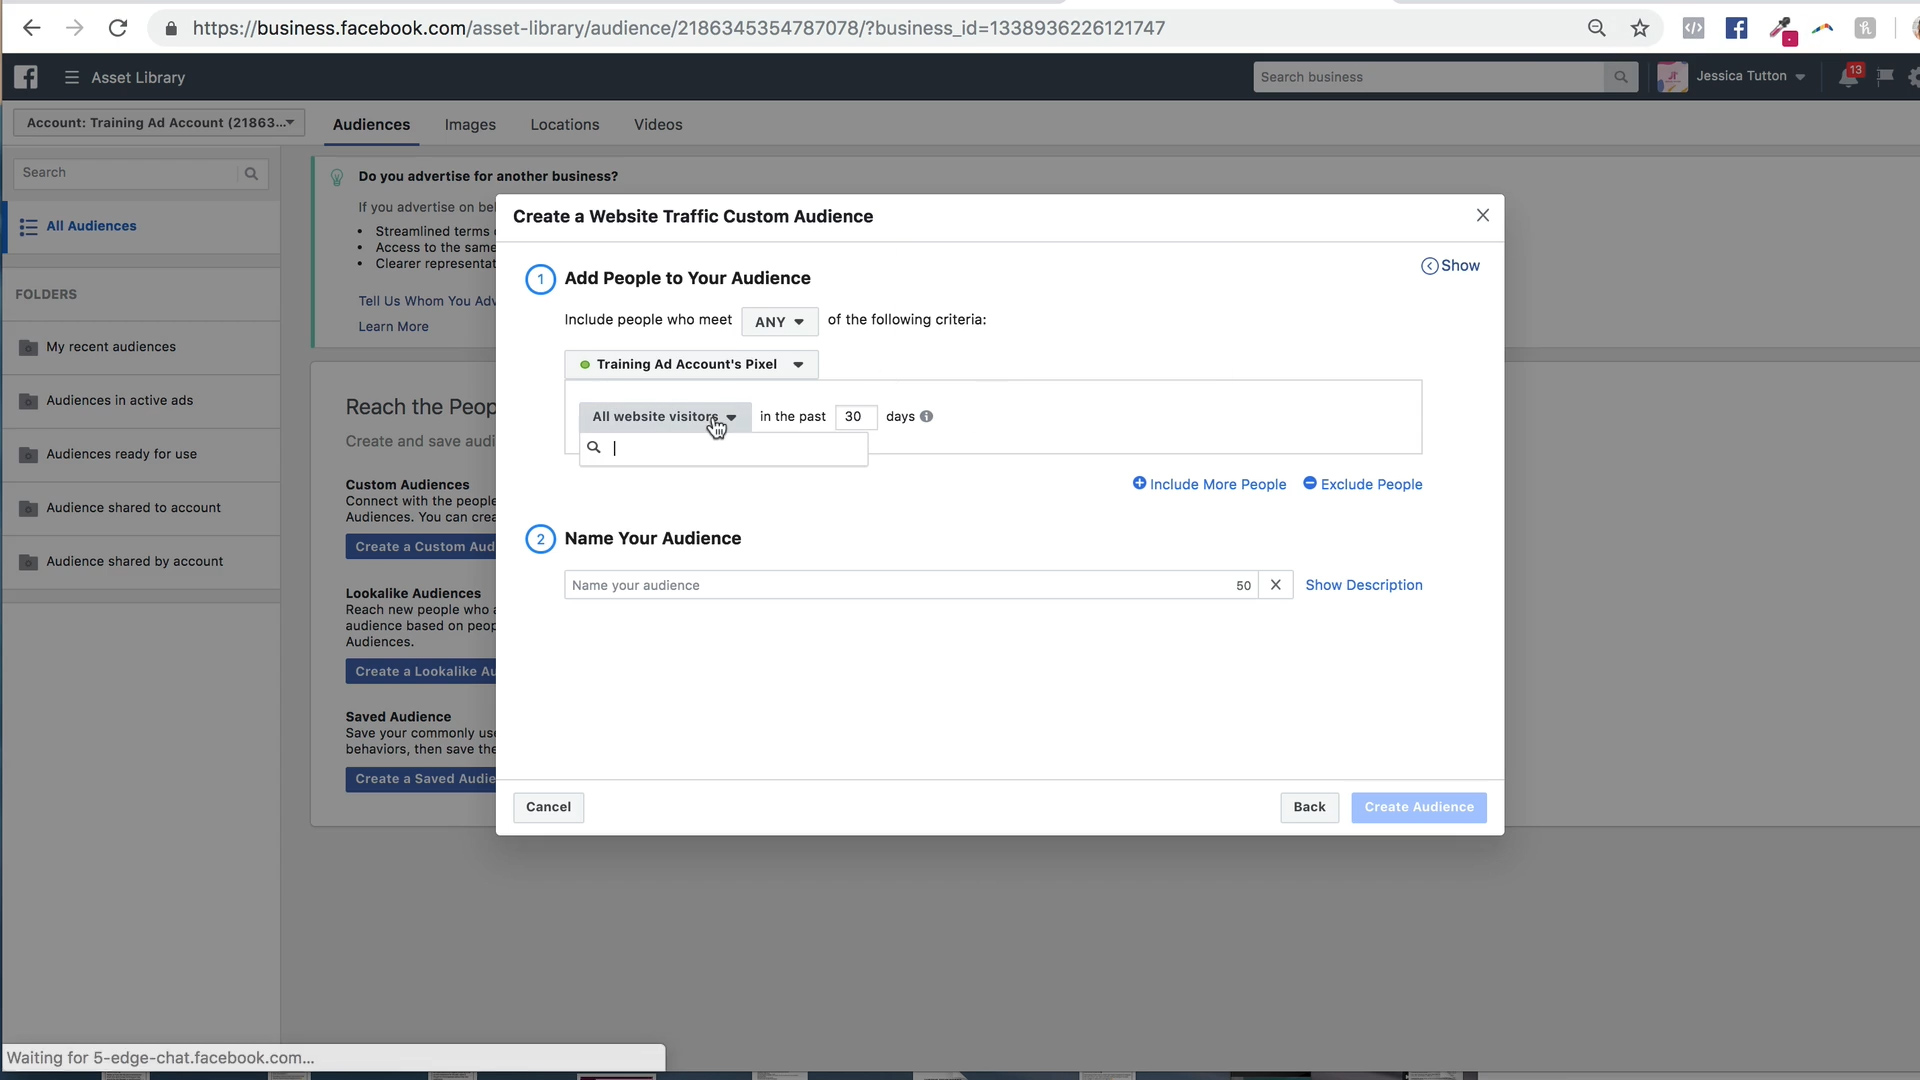
We are then going to click on create a custom audience and we're going to select website traffic.
You can now see that my pixel is active because it has a green circle there.
If your pixel is either red or grey, you might just want to check that it's been installed correctly using the Facebook Pixel Helper.
Here's where you can create your custom audiences.
So you can choose to start tracking all website visitors that have visited your website in the past 30 days. You can even create an audience to track as far back as 180 days.
And the second step is to just give your audience a name.
Once you've given your audience a name, you can select create audience and that audience will start to populate. You'll also see in this audience section how big your audience size is.
You can see your audience start to grow as you start driving traffic to your website and it will also tell you whether or not this audience is ready for you to start using in your ads.
That’s how you install the Facebook Pixel to Squarespace and set up custom audiences!
What an awesome tutorial. Thank you so much Jessica for sharing such a great tutorial with us. Guys, if you want to learn more about Facebook ads, definitely head over to Jessica's website and check out all of the valuable content that she shares and reach out to her for more help on your Facebook ads. And don't forget if you haven't subscribed yet, do so now and I'll see you soon.





![8 Simple Productivity Habits 🍃 [Working From Home Tips]](https://images.squarespace-cdn.com/content/v1/5696066f1115e0e4e3059106/1754827471549-ZKNAPAMQKEENQ4EBZ8IG/simple-productivity-habits-thumbnail.jpg)


![Kajabi Review 2025 - What You Need to Know Before You Buy! [Kajabi Pros & Cons]](https://images.squarespace-cdn.com/content/v1/5696066f1115e0e4e3059106/1747073445742-LIZROCCY37VZHY8DRA4K/Kajabi-review-2025-thumbnail.png)

In this video, I’ll show you step-by-step how to capture emails directly inside Instagram DMs using Manychat - no landing page required 🤯